A word from Anton: In an effort to play something other than one of the five or six "super-armies" in the first book I decided (foolishly in retrospect) to roll dice to randomly select the army that I would use. I ended up with the Parthians (army #51 if anyone still has a copy of the old WRG Ancients Army List book #1 lying around). After The Housemartin told me what force he had chosen I attempted to craft a force to oppose him. The only reliable forces on the Parthian list are Super-Heavy Cataphract Lancers and Light Cavalry Horse Archers, all of the available allies being trash and no infantry worth the trouble. This was a poor choice to oppose an army equipped almost entirely with Two Hand Cut and Thrust weapons but it was what I had to work with. I'm sure that The Housemartin's retelling of the story will not be too rich in gloating, but it was a debacle.
A note from the Housemartin: Anton is being overly critical of his troops, it did not end well, but along the way dealing with Anton's army was extremely difficult. It was like trying to smash water with a hammer. There was a lot of action, but nothing really happened except my troops kept getting slowly shot down.
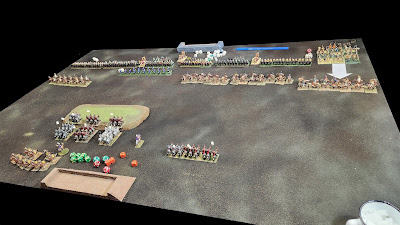
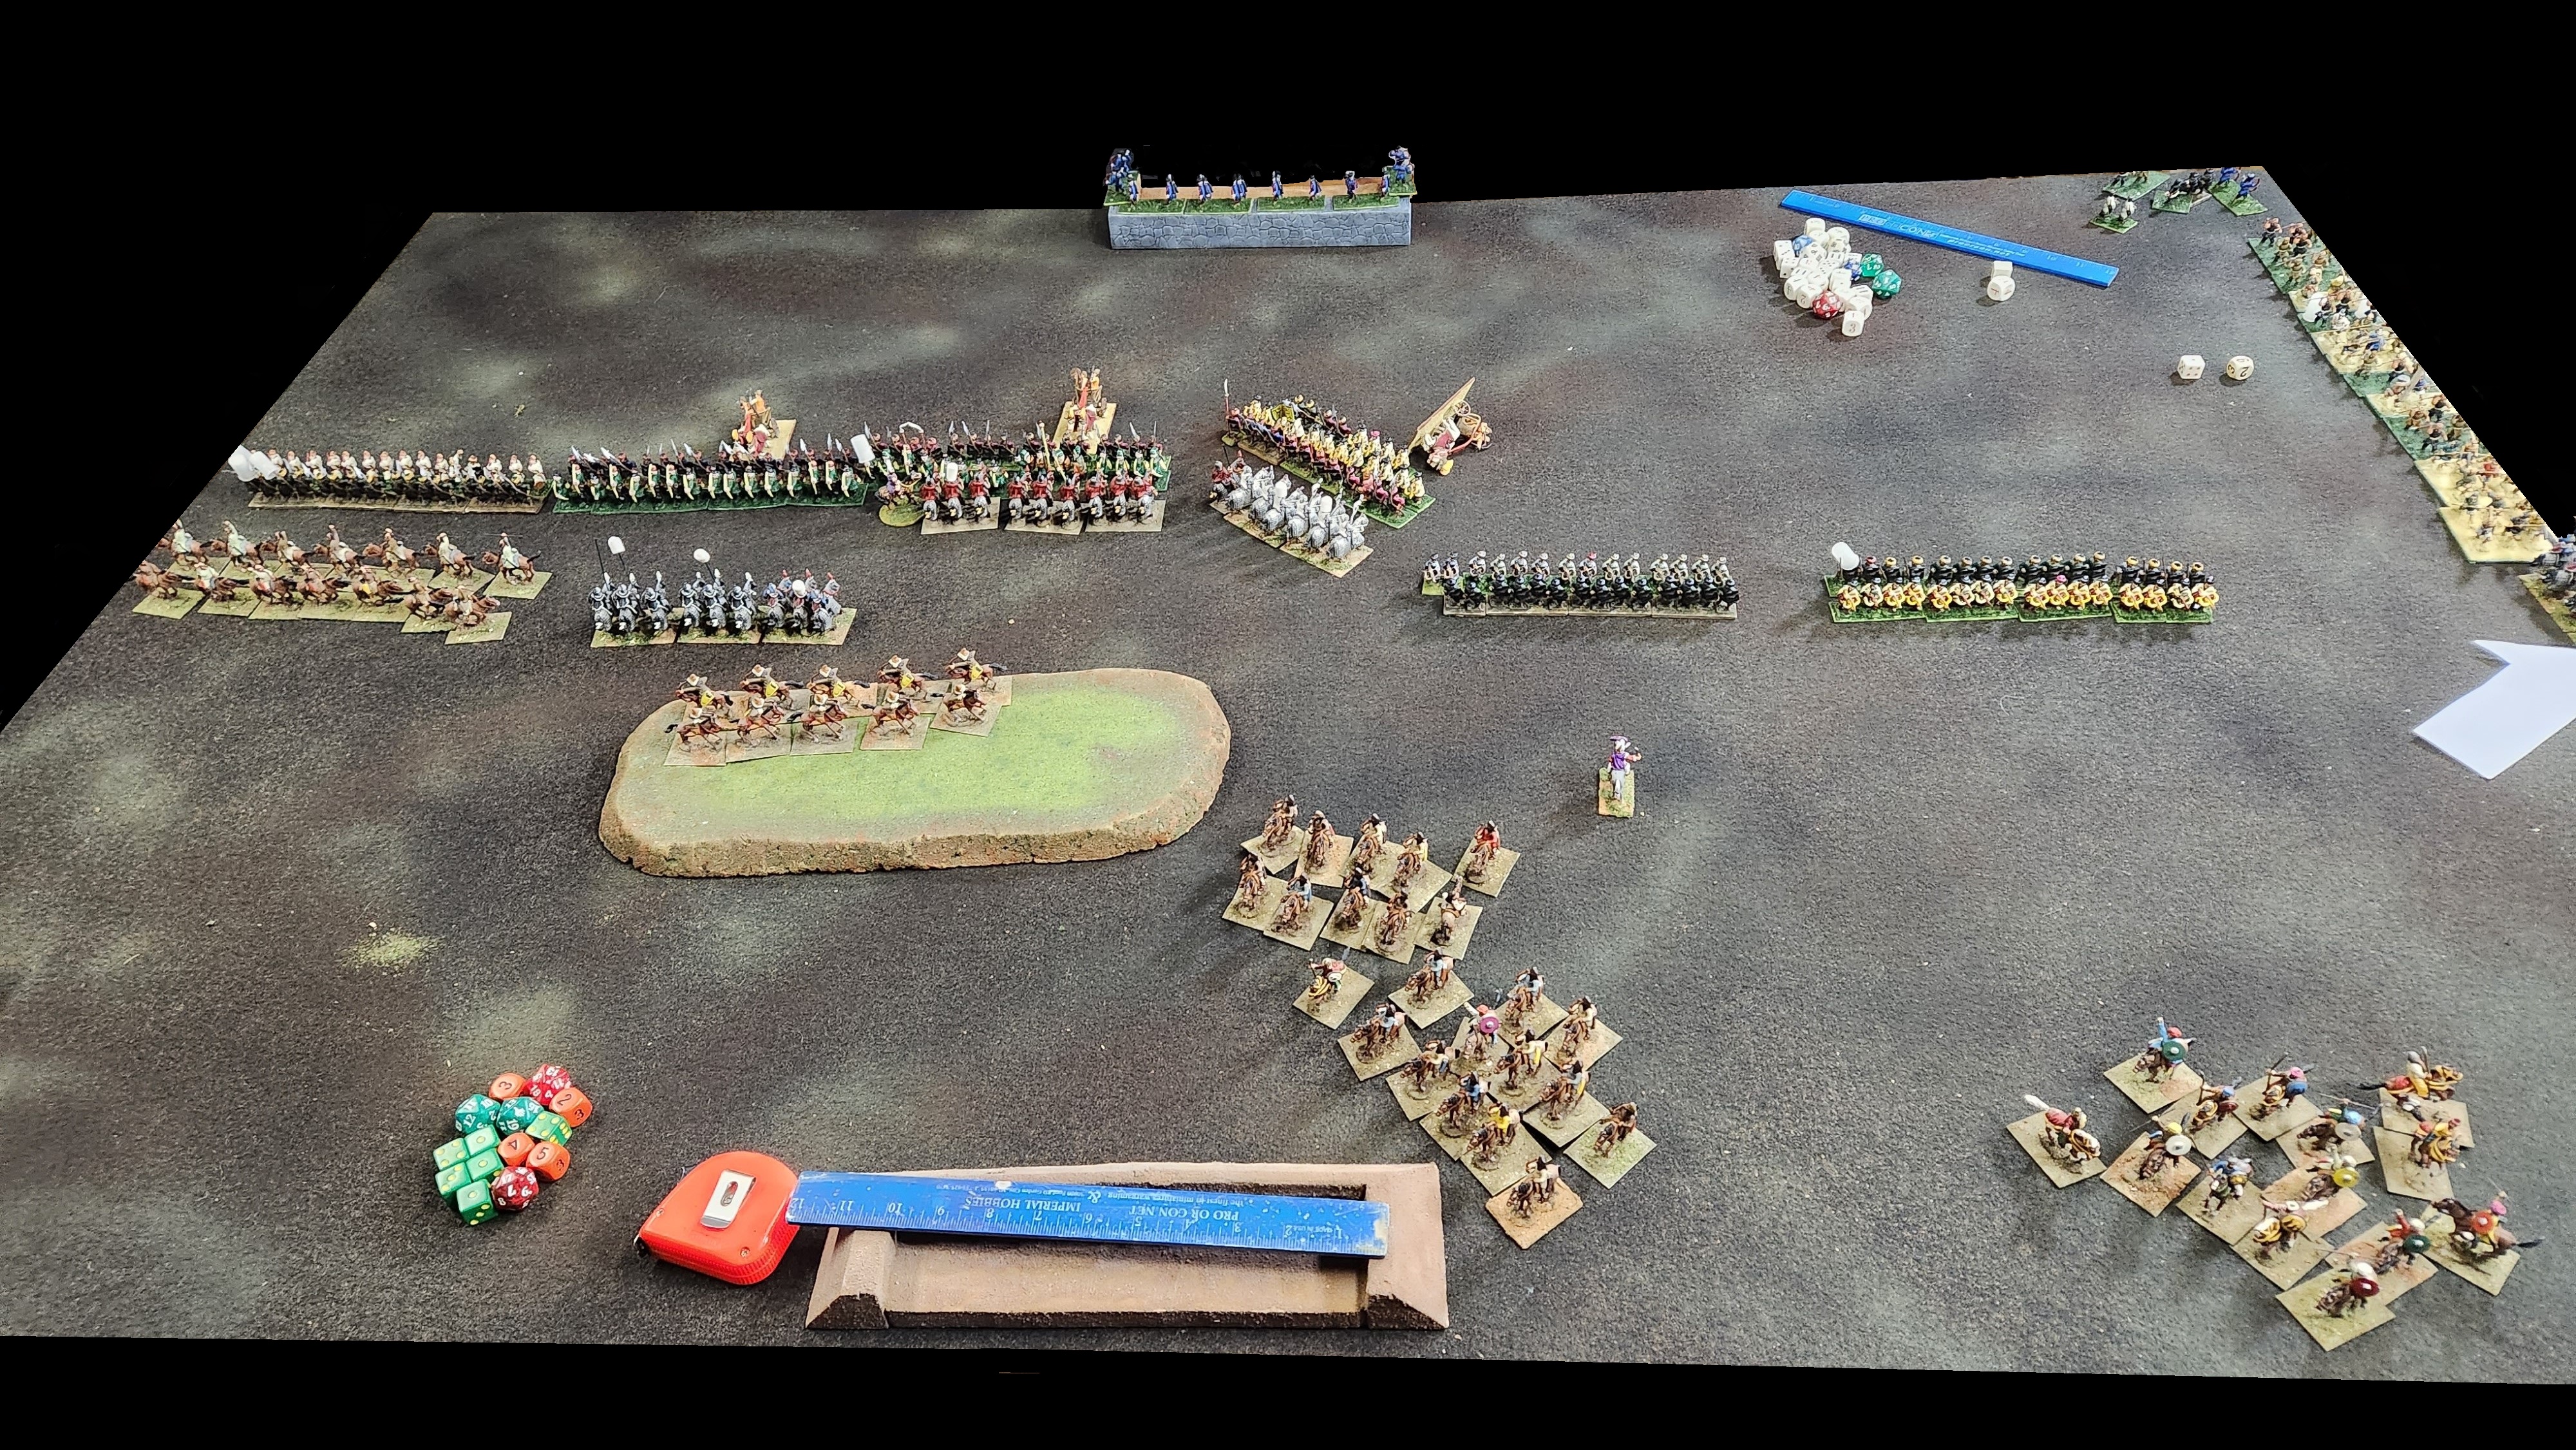
Unusual for us, we remembered to take a picture of the set up. Anton had 132 scouting points to my 3 ... so I set up first. In the picture above Anton's (the closer army) Parthians are deployed left-right:
14 x Horse Archers Irg C, LC, B
12 x Cataphracts Irg B, SHC, L
11 x Cataphracts Irg B, SHC, L
12 x Horse Archers Irg C, LC, B
12 x Cataphracts Irg B, SHC, L
13 x Horse Archers Irg C, LC, B
13 x Horse Archers Irg C, LC, B
In the back is his CinC, SHC, L, His Subgeneral SHC, L and ...
12 x The final unit of Cataphracts Irg B, SHC, L
14 x Horse Archers Irg C, LC, B (on extreme right)
My army deployed left to right in the back ground is as follows:
In the background is the first of six units that are all the same. These will be called Units A through F and consist of the following
Unit A 32 x Foot, All Reg C, MI, half have JLS and shield. The other half has 2HCT (4 have shields).
In front of them is Unit B.
The second unit starting in the rear is Unit G, 21 x Archers, Reg C, LI, B.
Between Units B and C is a sub General in a 2 horse Lt Chariot w/unarmed driver and the general armed with a B, 2HCT, and JLS and a P standard
The unit in front of the archers is Unit C.
Between units C and D is my CinC 2 horse Lt Chariot w/Irg B unarmed driver and the general armed with a B, 2HCT, and JLS
Next is Unit D
Then comes Unit E.
Between Units E and F is my second Subgeneral 2 horse Lt Chariot w/unarmed driver and the general armed with a B, 2HCT, and JLS and a P standard
Next comes Unit F
Finally I had Unit H 50 peasants Irg D LMI, IPW lurking in the rear.
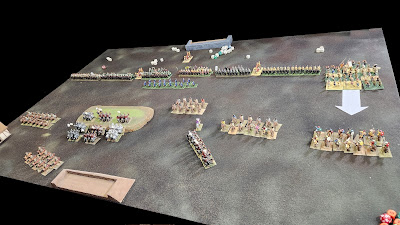
On turn one, my main battle line stood still for a turn while the flanks completed deploying. Otherwise only my light infantry archers moved to get out in front of a portion of my battle line. Anton's light cavalry "shot" forward physically (16 inch movement will do that for you) then literally shot forward. My archers returned the favor and my line troops simply accepted their current reality. Meanwhile Anton's Cataphracts slowly rumbled up the hill creating a distant sound of thunder for my army to enjoy. Anton's one visible unit of Cataphracts advanced slowly in the center. As a result of all the archery, some morale tests were needed. Three of the four of my units that had to test shrugged off the Parthian fire. However, my peasants, who could just see the CinC's advancing personal army standard as well as the personal standard of their nearby subgeneral found the archery an insult to their ancestors and immediately became impetuous (white arrows in front of a unit indicate impetuous). Anton's one unit of archers who received the entire weight of my my 21 archers failed their morale test and were required to retire for two periods and only barely avoided retiring off the field!
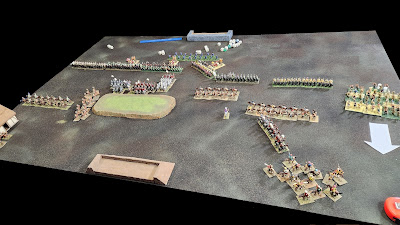
On turn two, Anton discovered that while rushing forward into effective archery range did lead to more effective archery that turn, it also resulted in immediate charges by my entire battle line the next. So on turn two we see all of Anton's horse archers in pell-mell retreat. However, as they "done runt off" the horse archers delivered their infamous "Parthian Shot" to my infantry, the positive for my side being that all these shots were at long range so caused less casualties. Meanwhile, since most of my troops were regulars they simply stopped on Anton's troops evade line and "rallied forward" allowing them to continue the advance next turn. If my troops were irregulars they would have charged their entire move this turn but had to stand around reorganizing next turn. Thus my regulars were able to continue to close distance on Anton's troops. Ominously Anton's three units of cataphracts on the hill crested to tops and came into view, while his unit on the plain wheeled to deal with my Impetuous peasants. In the missile exchange Anton, had a unit shoot my archers and the combination of casualties and my poor dice roll resulted in my archers deciding they would no longer advance.
On turn three Anton charged my archers with a unit of his Cataphracts, the archers evaded behind the battle line. On the far right, my impetuous peasants again charged Anton's offensive horse archers and when we measured discovered that the horse archers were still in reach so they had to evade once again. Meanwhile my battle line advanced as far as they were allowed on the left (you have to stay three inches away from an enemy unit unless you are charging them). The troops on the left side of my battle line advanced further to close the distance on the horse archers. In the ensuing archery it was discovered that both of Anton's horse archer units on the right side of my battle line were within effective range this turn ( so there will be more charges next turn). Seeing an opportunity I wheeled and advanced Unit D in preparation for next turn's "festivities". I also in anticipation joined my subgenerals to units B and D, and attached my CinC to unit ... "C".
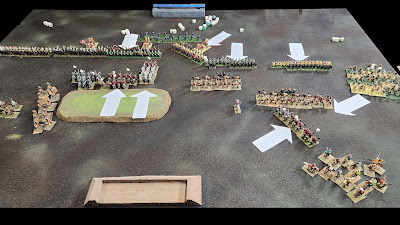
On turn four, as the white arrows behind units demonstrate, the charging ensued. To avoid Anton massing his Cataphracts on one of my units I risked getting caught moving by Anton's mounted troops and initiated charges. My Unit C charged Anton's middle unit of Cataphracts. My unit D charged Anton's right side unit of Cataphracts. My units E and F Charged Anton's Horse Archers. My impetuous peasants turned to meet Anton's fourth unit of Cataphracts charge, but stopped in time ton receive the actual charge. My unit A had no target to charge, so could not. While my Unit B could have charged Anton's left side unit of Cataphracts, I decided that was not needed as that unit could not interfere with the other melees. Anton did not choose to charge with that unit so they would stand around as the fights ensued. As I expected Anton wanted to charge both his middle and right side unit into my Unit "C", but the charge of my Unit D forced Anton's right side Cataphract to redirect their efforts to my unit D. The Cataphracts wheel and expansion gave my unit plenty of time to stop and receive the charge at the halt to avoid getting caught moving. Meanwhile my Unit "C" also had enough time to halt and receive Anton's middle unit of Cataphracts as the middle Cataphracts needed time to expand to have ANY possibility of winning the fight. Anton's horse archers "done runt off" again on the right flank and his fourth Cataphracts crashed into my halted peasants. In the background, lacking anything pertinent to do, I had my archers occupy my camp.
The results of turn four are shown here. Anton's red Cataphracts caused more casualties to my Unit C, than Unit "C" did to them, but not enough casualties to push my unit back. Meanwhile, my Unit D did more casualties to Anton's white Cataphracts than they did to Unit D so the White Cataphracts were pushed back. Unfortunately since I had not charged I could not follow up so the White Cataphracts broke contact for the moment. However the White Cataphracts did get lucky and managed to kill the sub general attached to Unit D sparking a series of tests for many of my units who saw him fall and were NOT in the command reach of my CinC who survived his combat. All of my units passed their tests, in fact Unit D passed so well they would have gone impetuous if not regular "C" morale grade, which is almost impossible to get impetuous, so apparently Unit D simply loved that sub general!
Anton's horse archers on the right have retire further from my battle line's charges. However, the battle did not go so well for my impetuous peasants. Some readers may recall that in our
Levanticide battle I used Irregular A peasants armed with Improvised peasant weapons to Anton's considerable discomfort. Turns out Irregular "D" peasants armed with improvised peasant weapons, even when impetuous, are no way near as impressive. My peasants were smashed and routed by Anton's Cataphracts, however we were RIGHT at the edge of the board and thus my routing peasants went off the edge of the world. And unfortunately (for Anton) his Cataphracts went off the edge too.
At the start of Turn Five, my Unit D declared a charge against Anton's White Cataphracts. When Anton rolled the Cataphracts reaction test he rolled a "6" resulting in his cataphracts breaking and running away.
Thus creating something of a hole in his formation (and half of his combat troops missing from action).
Otherwise turn five saw my unit A charged Anton's horse archers on the left. Anton decided to have his CinC join his blue Cataphracts and charge my unit B (with my remaining subgeneral attached to it). Meanwhile, my CinC removed himself from Unit "C" and noticing the hole forming on my left flank ordered the archers to that side of the battlefield with all haste to try and stabilize the situation. The CinC also ordered unit F to refuse the left flank to buy time for the archers arrival.
In the only combat of the round between my Unit B and Anton's "blue" Cataphracts, it was discovered that Anton's troops were more "blue" then "Cataphracts". The cataphracts took 64 casualties and only caused 29, thus receiving twice as many as they inflicted and taking at least 1 per figure in the unit, the "blue" cataphracts broke. In assessing the casualties Antons CinC was also among the dead!
The resultant morale tests for Anton started off sort of well. Anton's off board Cataphracts who had chased my peasants off the board went impetuous, unfortunately he wanted them to stay calm and return to the field of action. Instead they savaged my peasants rear areas towards tomorrows dawn. From there, the tests near the fallen CinC caused his red Cataphracts and both horse archer units on the left side of the battle to join the silver and blue Cataphracts in rout. With only two units of horse archers remaining Anton conceded the game.
All-in-all it was an interesting game. Anton had to play COMPLETELY out of character and not just come screaming across the table as is his want, but he performed the, out of his comfort zone, evolutions well. What Anton did not notice, and I did not volunteer at the time was that my Unit E as of the last volley of arrows they endured was down to exactly 2/3 strength, the next casualty would see then only rolling two dice for morale tests all due to the continual harassment of archery. My units A and F were similarly dwindling with Unit F almost as bad off. Also, Unit D had suffered significant melee casualties and was too close for comfort to the same point. Combined, that is half my battle line nearing their own breaking point. It was a MUCH closer run event than Anton's opening comments suggest. But I will happily chalk up the victory for "truth, justice and the 'Shang wei'"!


What you lost again Anton. You better torch your dice
ReplyDeleteIt wasn't entirely the fault of the dice, the army I was running would have had serious problems with nearly any strong infantry force, much less one armed almost entirely with halberds!
DeleteLive and learn, next time he will face my Marian Romans
Yes, and I get to face them with Neo-Babylonians and friends.
ReplyDelete