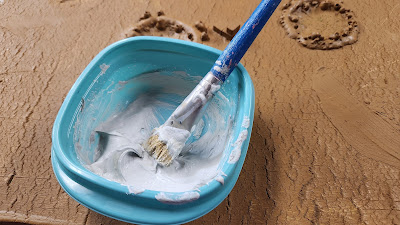
Pushing ahead to get this project completed as quickly as possible the next step is to "soften" the edges of our shell-holes. The Gorilla Glue does a fine job of expanding but often has bubbles that popped and almost always has an overhang at the edge where it joins the surface. To address these issues I paint over the surface with latex-based wallboard compound. A decent quality stiff bristle angle-tip brush about an inch wide is my weapon of choice (don't spend good money on it as this process absolutely WRECKS the paintbrush). You may have to add a bit of water to your wallboard compound, what you are looking for is the consistency of smooth peanut butter.
a shell-hole, the Gorilla Glue has given us a nicely raised edge
but there are some bubble that need to be addressed and the edges need blending
I transfer the wallboard compound to a smaller tub so that I can add water if needed
and leaving the big can open leads to it drying out
place a big blob in the center of the crater and swirl the compound into the open bubbles,
be sure to go both clockwise and counterclockwise to fill in all the gaps
bubbles gone, gaps filled,
the "wave peaks" can be pressed down after a few minutes, once the compound has begun to set
a couple of hours of steady work and the shell-holes are all squared away,
I also to the opportunity to take care of surface imperfections
as I waiting for the wallboard compound to dry I began on the revetments that line the trench walls
first step is to apply full-strength wood glue, I use a stiff bristle 1/2" paintbrush for this
they just needed the ends squared up to be ready for use
then I added uprights, this was complicated by the fact that unlike my first trench board which was built entirely of insulation foam, this set of boards is based on wood, I couldn't just stab them into the panel,
a lot of messy glue stuff and a fair amount of cussing was involved as I handling the tiny bits of wood with my bratwurst-sized fingers


Watching the transformation is very cool. The details being added is starting to make it pop.
ReplyDeleteCheers
Kevin
probably gonna need a lot of sticks.,...
ReplyDeletenice work!
I just opened my third package of 500, but this should finish the job (I hope)
Delete