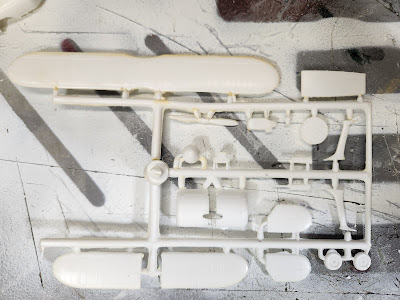
Continuing my effort to get all of my Polikarpov I-15 series models done in one push I sat myself down and confronted the pile of USK models. These kits were far from what current standards are but they are thirty years old and short-run kits of aircraft with limited appeal. Even with those caveats in mind they are frankly rather rough. Molding quality is below average, detail is foggy, parts fit is dodgy and the instructions are vague. The kits do have rather nice decals. They are the only option unless you want to spend thirty bucks a kit for I-15s.
and there is the kit in all its flashy glory
the cockpit interior, as I was intending to add a pilot I left out the control stick
the narrow cockpit opening forced me to install the pilot before closing the two fuselage halves,
the fit between the halves was surprisingly good
lower wing assembly was fun, no locating pins and uneven contact surfaces
meant that constant checking was requires as the glue dried to maintain proper alignment
after the first one I knew to sand the mating surfaces to get a better fit
next was the engine cowling, unlike the Encore kits there was no engine inside the cowling to assist with assembly, a far amount of filing and putty was required to get these in decent shape
I then set the I-15bis kits aside as I got to work on the one I-15 model,
this one has a "gull-wing" and (joyously) there isn't a cabane strut to be found!!
it took a bit of filing and sanding and a touch of putty to get it all sorted out,
but I would build ten of these before I did another kit with cabane struts
next it was lower-wing time
I braced the model nose-down to avoid the issue to wing-droop while the glue dried
while that was drying I took a stab at assembling the engine provided with the kit
this lasted a bout five minutes and then it was off to the spares bin to hunt up a replacement
happily my habit of saving "useful bits" saved my sanity and I found a replacement
which fit perfectly and even looked right
it even fit inside the cowling without too much trouble
this pleased me greatly, I then gave the kit an overall tidy-up on the seams and joints
before sticking the landing gear struts on and setting it aside to dry
all seven models sorted out and ready for a trip to the paint shop
This mass-build took a total of four days working about two hours a day. This is much faster than building each in succession would have taken. These are no competition-grade models (no rigging, or interior details) simply wargaming toys but I do strive to make a presentable finished product.Painting will go rather quickly as I can work on one as the others dry.


Hey, the directions may leave something to be desired, but you DID get REFERENCES! That is pretty impressive, now you can try and back check them and make sure they stayed true to their information.
ReplyDeleteIt will take a bit of digging those references are from the mid 1990's and my "Library of the Arcane" doesn't have a single one of them
DeleteThe 1990's! I thought they were older than that. Besides, "an idle mind is the devil's workshop", especially yours, it will give you something else to focus/work on.
ReplyDeleteI have eight more Soviet biplanes to go; two PO-2, two I-4 and four R-5s.....I'm afraid that I lack the strength to face that mob right now!
Delete"!2 O'Clock Charlie" from the TV show M.A.S.H.!! That was a PO-2! I love that plane, for the pop culture aspect of course.
Delete