Ed Note: I must say that in all my years of wargaming (nearly a half-century now) this is the silliest terrain that I have ever played across. The Housemartin and I followed the terrain generation rules exactly and ended up with this odd terrain. Also, despite my endless carping about poor dice rolling, this game saw the longest run of positive rolls in many a decade. Therefore I will quiet my complaining and work on my generalship!
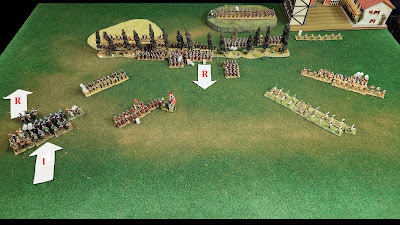
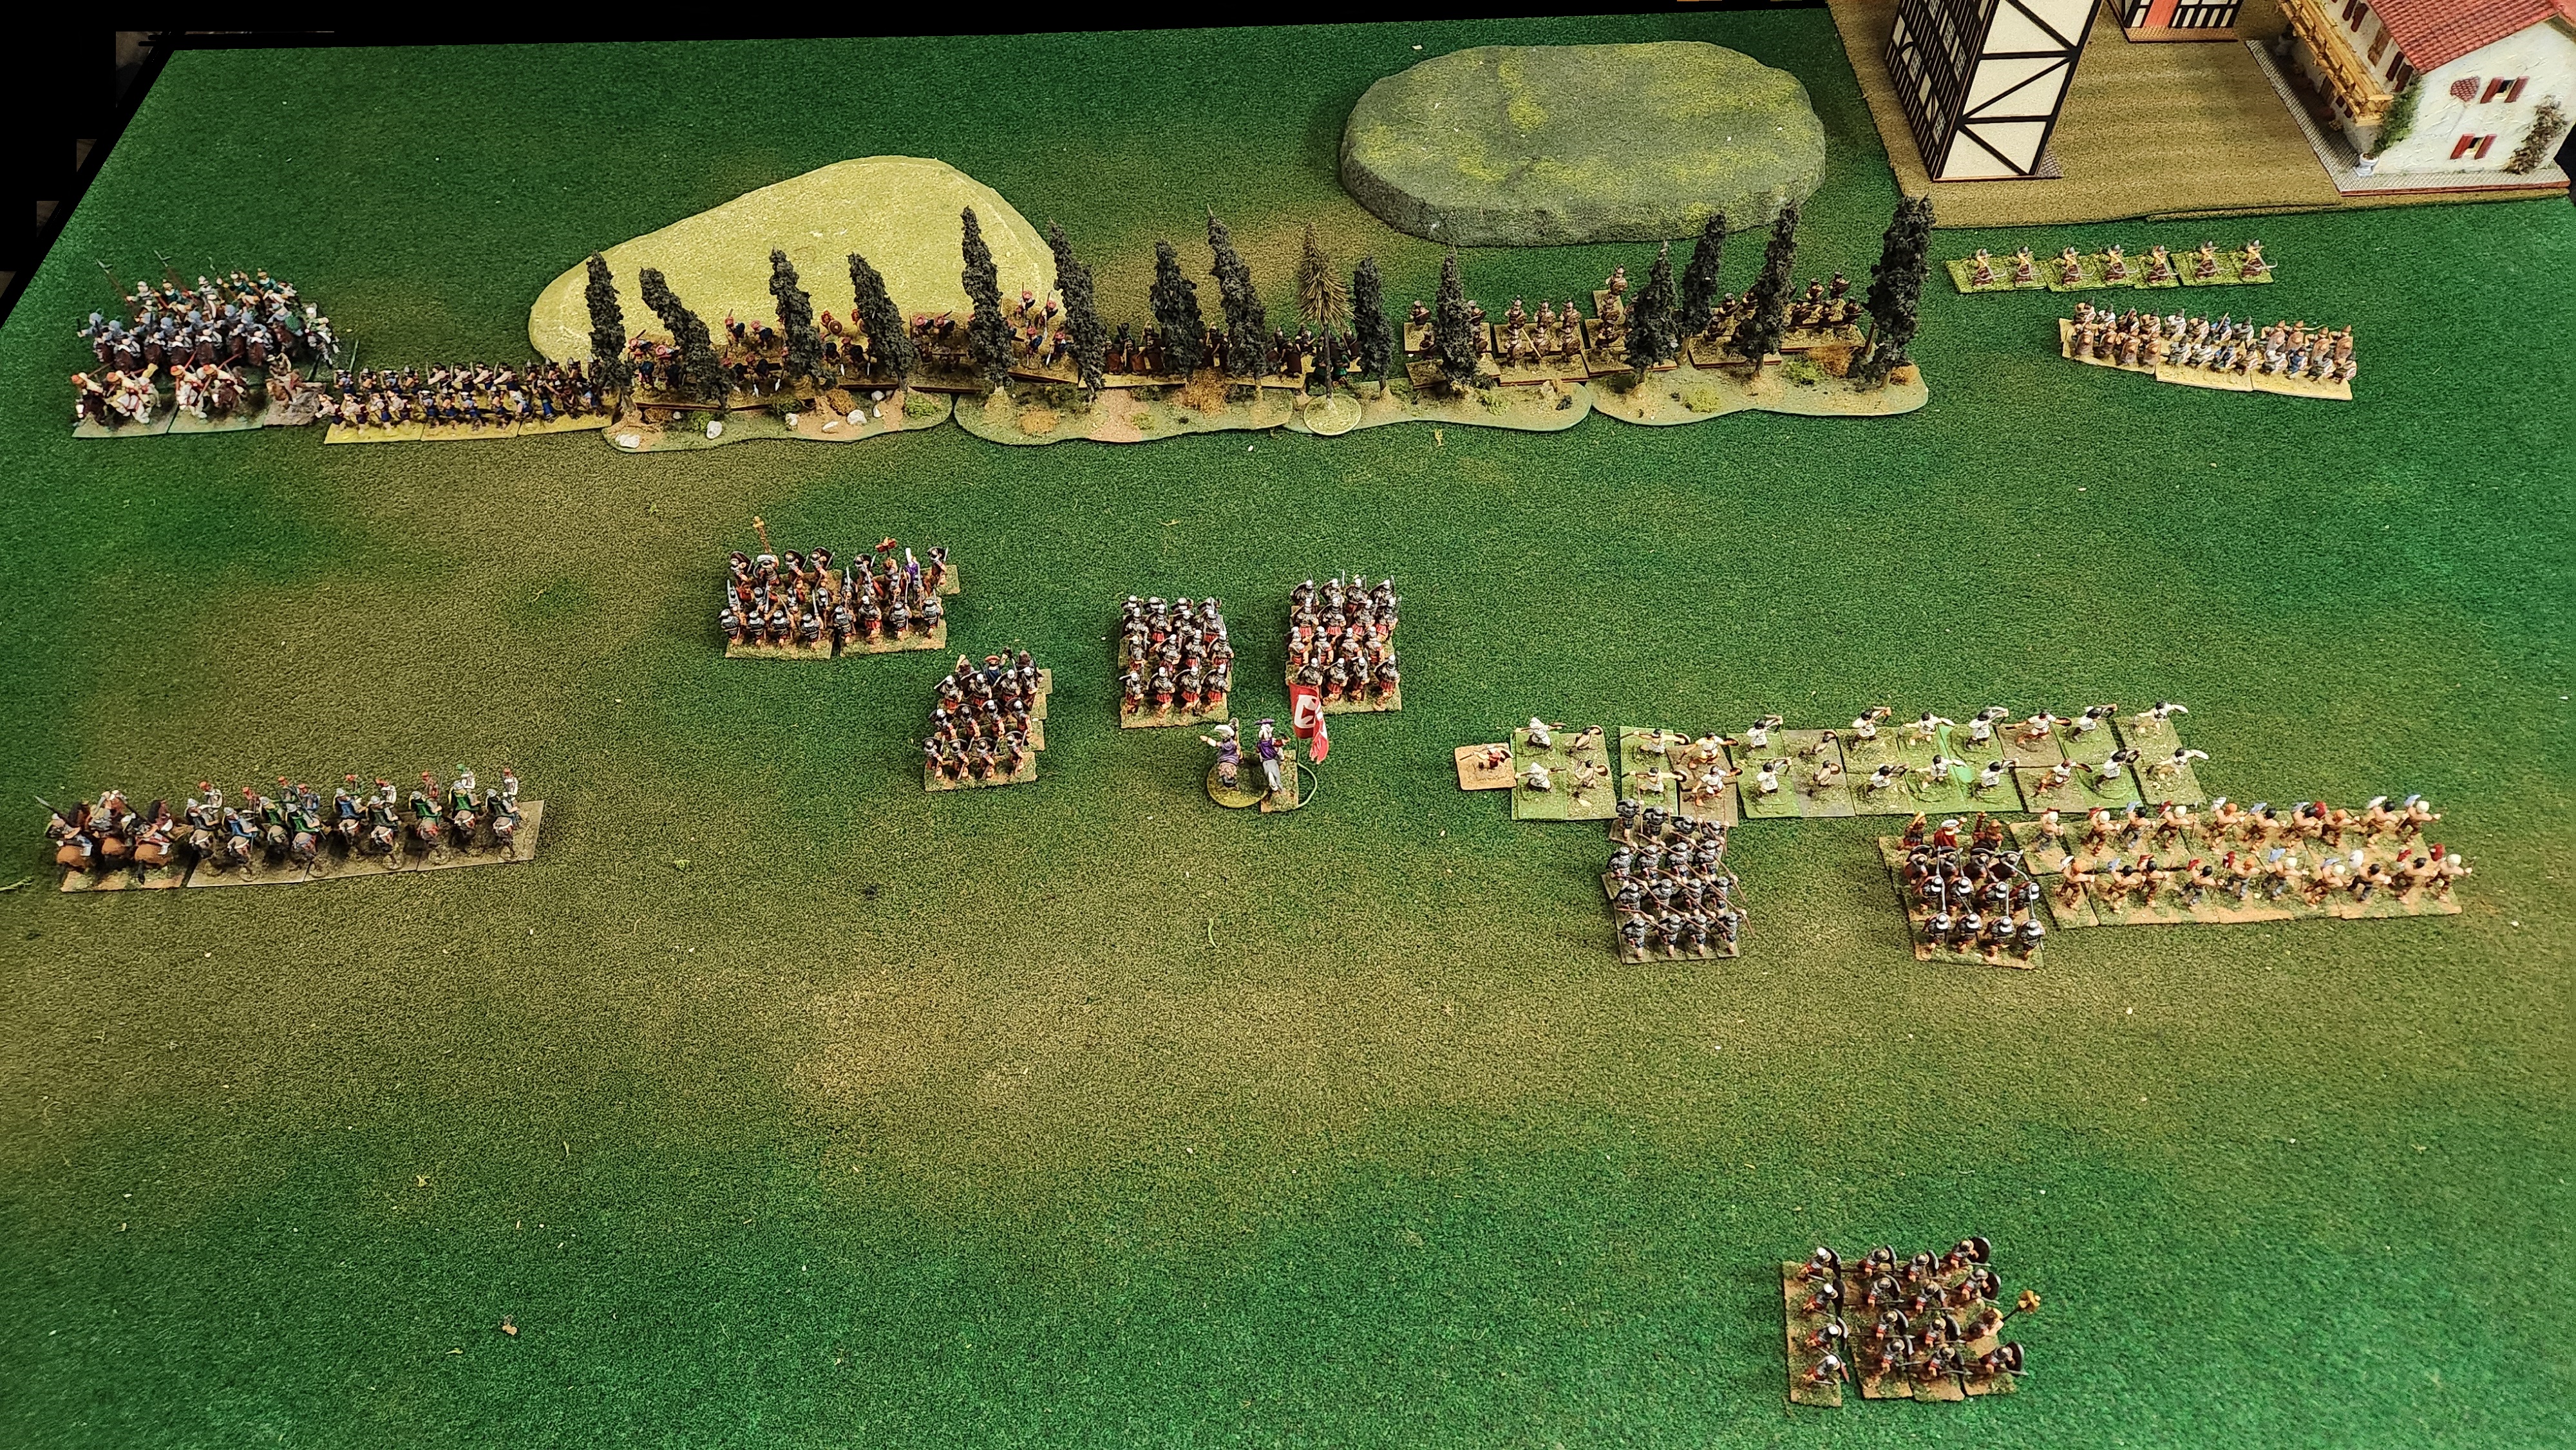
Anton's cessation of complaints not withstanding, I would be remiss to not complain about the fact that We rolled to play out of the Second Army list book, but Anton "senior momented" (Ed. note I am officially a Senior Citizen and I plan on milking it for all it is worth!) and decided to run an army from the first book. So his Marian Romans will be taking on my Late Imperial Romans. One thing for sure, the terrain turned out quite silly. I was trying to get a gentle hill for my artillery and Anton placed a wood line in front of all the hills ( I placed four of them). Two of my hill stuck, but unfortunately Anton's wood line obscured the field of view for both. I had 16 Scouting points, Anton had 14, so no one was outscouted and we both deployed from our right to left. Here are our deployments and the messed up terrain.
Here is Anton's Army Left to Right
Unit I 12 Gallic Cavalry, IRG B, MC, JLS & Sh
Unit II 24 Legionaires, REG B, HI, HTW & Sh
(Second Row) Unit III 16 Legionaires, REG C, HI, HTW & Sh
Unit IV 16 Legionaires, REG C, HI, HTW & Sh
Unit V (Second Row) 16 Legionaires, REG C, HI, HTW & Sh
CinC and Body Guard, REG A, HC, JLS & Sh, PA standard
Unit VI Light Troops 26 IRG C, LI, 12 w/B, 12 w/S, 2 w/JLS&Sh
Unit VII (Second Row) 16 Legionaires, REG C, HI, HTW & Sh
Unit VIII (Second Row) 16 Legionaires, REG C, HI, HTW & Sh
Unit IX (Second Row) 16 Legionaires, REG C, HI, HTW & Sh
Unit X 20 Thracians, IRG C, LMI, 2HCW, JLS, & Sh
Here are my Late Imperial Romans
CinC, EHC, JLS & Sh
Unit I 18 Cavalry, REG C, 8 SHC, L, 5 HC JLS & Sh, 5 LC, JLS & Sh
Unit II 24 Legionarii REG B, MI, HTW, JLS & Sh
Unit III 30 Auxilia, REG B, LMI, JLS & Sh
Unit IV 24 Legionarii, REG B, MI, HTW, JLS, Sh
Unit V 31 Auxilia, Reg B, LMI, JLS & Sh
Unit VI, 24 Legionarii, REG B, MI, HTW, JLS & Sh
Unit VII 7 Light Bolt Shooters, Reg C, Crew of 2
On turn One Anton began a general advance on my army. My troops in the center moved up to the woods line so they could get a glimpse of Anton's army and get the "surprise" sightings over with. My Unit I and II went around the left side of the woods line. My Unit VI went between the village and woods line in a column. And my bolt shooters came out of the village and formed up to open fire.
On turn Two Anton continued forward as did my Units I, II and VI.
On turn Three My cavalry and Anton's lined up for charges on the left. Anton continued moving toward the wood's line. Anton's skirmishers and my Bolt Shooters exchanged missiles as my Unit VI took station on the extreme Right.
On Turn Four my Cavalry charged and Anton's cavalry ran away (typical of the French). My Unit II began wheeling around the woods line to threaten Anton's left flank. On the far right my Unit VI began moving forward to threaten Anton's Right flank.
On turn Five Anton's First Legion charged my Unit II. Unfortunately, My unit was forced to take a morale test for their third turn under missile fire and I rolled a 6 causing the Legionarii to stand around and absorb another round of missile fire.

On Turn Six Anton's Unit I regained their nerve, went impetuous and charged into my Unit I, who charged. My Unit II managed to not only follow win the second round of combat against Anton's Unit II, but managed to do so causing enough casualties to break Anton's First Legion. Meanwhile, Anton's Unit IV charged my Unit IV, and Anton's Unit VII Charged my Unit V and my Unit VII Charged Anton's Unit X.
In the combat Anton's Unit X rolled an Up 4, the best possible roll. This resulted in pushing back my Unit VI.
And Anton's Unit I, rolled an Up 3. This hot streak of dice rolling also led to pushing my Unit I back.
On Turn Seven Anton's Unit I pushed back for a second time my Unit I causing them to break. My Unit II caught Anton's Unit II and further carnage ensued. Anton's Unit III charged in to assist his retiring Unit IV. My Unit IV managed to push back and Break Anton's Unit IV, but was itself pushed back by Anton's Unit III. Meanwhile Anton's Unit V charged into the woods line to assist his Unit VI and the two of them managed to break my Unit V. Anton's Unit X managed to push back my Unit VI for a second time.
On Turn Eight, My Unit I was pursued by Anton's Victorious Unit I. My Unit II rallied up and Anton's General joined his first legion to rally off their shame. Anton's Units VI and VII rallied up on the far side of the woods line. My CinC joined and rallied up my Unit V on top of the hill in my deployment zone. On the right Anton's Unit X pushed back and broke my Unit VI.
On Turn Nine, Anton's Cavalry continued riding my cavalry into the ground (SHC can not out run anything). My Unit II charged Anton's Unit II again a it rallied. Anton's Unit III and my Unit III charged each other,with my unit pushing Anton's back. Anton's Units IV and VIII and my Unit IV all charged each other. And Anton's Units VI and VII charged my reforming Unit V on the hill next to the village.
Unfortunately for Anton, His general was killed when my Unit II charged the Unit the CinC had just rallied. The Unit passed its morale test as currently they were the only people who knew the CinC was dead. (Ed. note, This continues my long tradition of heroically dead generals)
On Turn Ten. I managed to break Anton's Unit II again, but Anton's hot dice streak continued and almost the entire army ignored the death of their CinC. In the woods line I managed to push back Anton's Unit II again and break it, But Anton pushed back and broke my Units IV and V. Even though My Unit VII managed to do enough casualties to stop Anton's Unit X as it attempted to charge my bolt shooters. However, at the end of the turn I found myself with only two unbroken units and one of them was the bolt shooters. I therefore conceded the game to Anton and his suddenly hot dice.


No comments:
Post a Comment