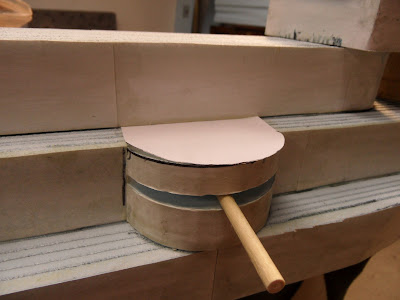
tie rack pins, just the ticket
sponsons fitted into place and their positions marked
ever so carefully marked
the tie rack pin has a handy ball on it, you force the ball into the gunport
and then squeeze the foam around the ball, it will hold the gun in place and allow it to pivot freely
a thin bead of glue around the edges and then press firmly into place,
be sure to mount the gun first, once these are glued down they will have little flexibility
and it will be hard to get the gun through the port
Ta-Da! we have armament! I test-fitted a deck plate over the top of the sponson
to make it look more like armor and to hide the gap where it joined the superstructure
the usual glue mixture is applied
and the deck plate fitted and covered with another coat of glue mixture
the gunports in the ends of the superstructure posed a problem, I couldn't get then to "yawn" open and accept the ball of the tie rack pin, I had to trim the pin head to fit into the gunport, after it is in a quick ninety degree twist and the remaining part of the ball engages the foam and the gun stays in place
slip the gun into the port
and there we are, ready to go
all six secondary guns have been mounted
she is starting to look like she means business
now for the main guns, I fitted the turret into the base and drew the gunport
the paper-mache boxes that I use for turrets have this tag on the bottom
(which in our case it the top of the turret)
removing it makes a mess of the top of our turret
so a new top must be made, I traced the box onto a bit of card and then cut it out,
the old photos show a good many turret tops made up of parts
so I folded it to make creases to look like joins in the armor
and glued it down
I liked the results so much the I decided to armor the entire turret in card
turret number one finished
the second awaits the same treatment
this is a sort of important point, cut the curved parts at the top and bottom
of the gunport first, it is much easier that way,
BTW make sure you have a sharp knife
so you don't suddenly slip and do this
the gunport ready to go
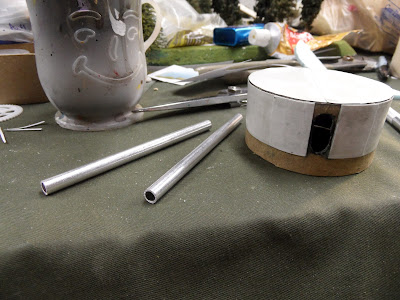
I rummaged around and found some scrap bits of
aluminum tube to use as the main guns
(yes, my water cup for my brushes in a Kool-Aid Man cup)
needing something to hold the gun barrels in the turret I decided
to fill the bulk of the turret with a chunk of blue board
pressing the turret firmly onto the blue board left an impression
that I used as a guide while cutting out the parts
filler chunks ready to be installed
a sung fit and a bit of glue
the tube was simply forced into the foam and glued in place
a crude but affect way to make sure your guns are the same length
I haven't decided on what sort of light weapons to fit, QF guns or maybe some Gatlings or Pom-Poms. I f I go with the latter two I will violate the scratchbuilt claim and just buy some as there are a lot of good looking models available at reasonable cost.


Now that makes me want to play VSF.
ReplyDeleteWell done, sir.
I like the way this is coming along. Very nice work.
ReplyDelete