The Stug kit being a dead-easy build I looked for something that would be more of a challenge, there it was the BA-10. Not that there is anything particularly hard about this kit but is does have lots more parts and they are tiny (and my fingers are bratwurst-sized). Off to the races I went!
Box art, nice to see something other than all-green on Russian armor
box rear, no room here for instructions
the contents
sprue side A
sprue side B
details, wheels, lots of wheels
the turret top is excellent
assembly begins, the rear fenders join with the hull sides and spare tires
the spares go onto the tiny stub axles on the hull side
creating this ungainly looking thing
the chassis and front fenders come as one part
that the upper hull snaps over...
......like so
next come the front hood and cab, the M.G. is part of the turret base
and threads through the hole in the front of the cab
an ingenious way of having a delicate part like an MG barrel
without having to make a tiny part that will get lost in handling,
this assembly pops in place on the top of the hull
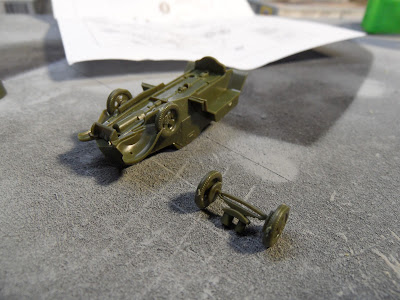
and we are now ready for the suspension, front axle and wheels
attach the wheels carefully, the fit is tight and the parts are small
the axle is then pressed into place, I used the back edge
of my craft knife to press it into place to avoid stressing the wheels
more of those tiny details that probably no one will ever notice,,
leaf springs for the rear axle
the rear axle and wheels
it is often easier to press the axle down onto the wheels
carefully push those wheels in before adding the outside dual wheels
I pressed the brake drum down into the wheel with the back edge of the craft knife
rather than pushing on the end of the axle to avoid snapping the part
done and ready to go
two lugs, two holes, they just snap into place
the headlamps, I didn't grt any photos of the assembly of these as it needed at least three hands to do,
I can tell you it is possible to snap them into place by putting the straight shaft into the hole on the side of the hood and then flexing the fender down until the bent end pops into the hole in the fender,
I glued all of the other ones I built that day
it captures the look very well
side
front
3/4 rear
Very Highly Recommended


Cool kit, the BA-10 got to be one of my favorite armoured cars.
ReplyDeleteTa very much, just got one of these at last and this should prevent an impatioent mishap...
ReplyDelete