
it was almost inevitable, wasn't it?


A little while back I was playing around with my Proxxon Hot Wire cutter (how many of these stories start that way?) and knocked up some ACW style ironclads. Knowing the danger such things presented to my painting schedule I offered them up to anyone who would like one. Most went to good homes. Sadly this orphan was left alone.
Having an afternoon free I considered just chucking it in the bin and getting back to my Lace Wars cavalry schedule, but, once I had picked it up I got to thinking how simple a job it would be. The next thing I knew I was gluing things into place and cutting index card to represent the railroad irons that the Confederates used for armor. Of course after a few hours I was in too deep to quit so I plunged on and finished the job. This is where we stand now; just waiting fore the rivets to dry so I can start painting. Another pointless project, I don't even game ACW in 28mm!
This is how things played out.....

sitting there, so innocent looking, just a few simple geometric shapes

I still can't cut curves worth a darn, so there was bit of sanding involved

fitting the bow-plate

wood glue, I ran out of Titebond and used Elmer's
(which works great on real wood but behaves oddly when thinned and used on blueboard)

spread it around a bit with a brush to get good coverage

in no time I had the edges covered in card

the superstructure had a huge contact area, which would dry very slowly as the blueboard is not water-absorbing, so I spread a very thin layer of glue on and set it aside for a bit to get tacky

thin the glue slightly to ease spreading,
also sand the surface lightly beforehand to give the glue something to hold onto

too lazy to roll paper smokestacks I resorted to using instant drink tubes

they do look the part

then it was time to start making the iron rails that would be the armor
index card is great for this as the lines make it easy to cut long straight pieces

a thin coat of glue and I started laying the rails into place

as that was drying I added some armor to the pilothouse

more armor, I leave the extra part stick up past the edge of the work,
it is much faster than fitting and trimming each piece as it is installed

once dry you can trim it back with scissors

another "look check" to make sure I was on the right path
I don't work to plans and was building this from memory

joining plates to cover the rough ends of the railroad "armor"

nice and tidy

shutters over the cannon ports, some raised, some lowered

then the pilothouse got attached

the bottom of the smokestacks were wrapped in a few windings of card to give them some heft
and make them easier to glue into place

cannon ports were cut through the armor plates

Quaker Guns! the cannon are just bits of dowel drilled out at one end
and sharpened on the other, then poked into the blueboard

then a liberal application of rivets, all that remains is paint

a base coat of flat black

50/50 mix of black and metallic steel wet-brushed into the black

33/33/33 mix of black/steel/dark gray added over the top of that

followed by a drybrush of dark gray

then a drybrush of medium gray
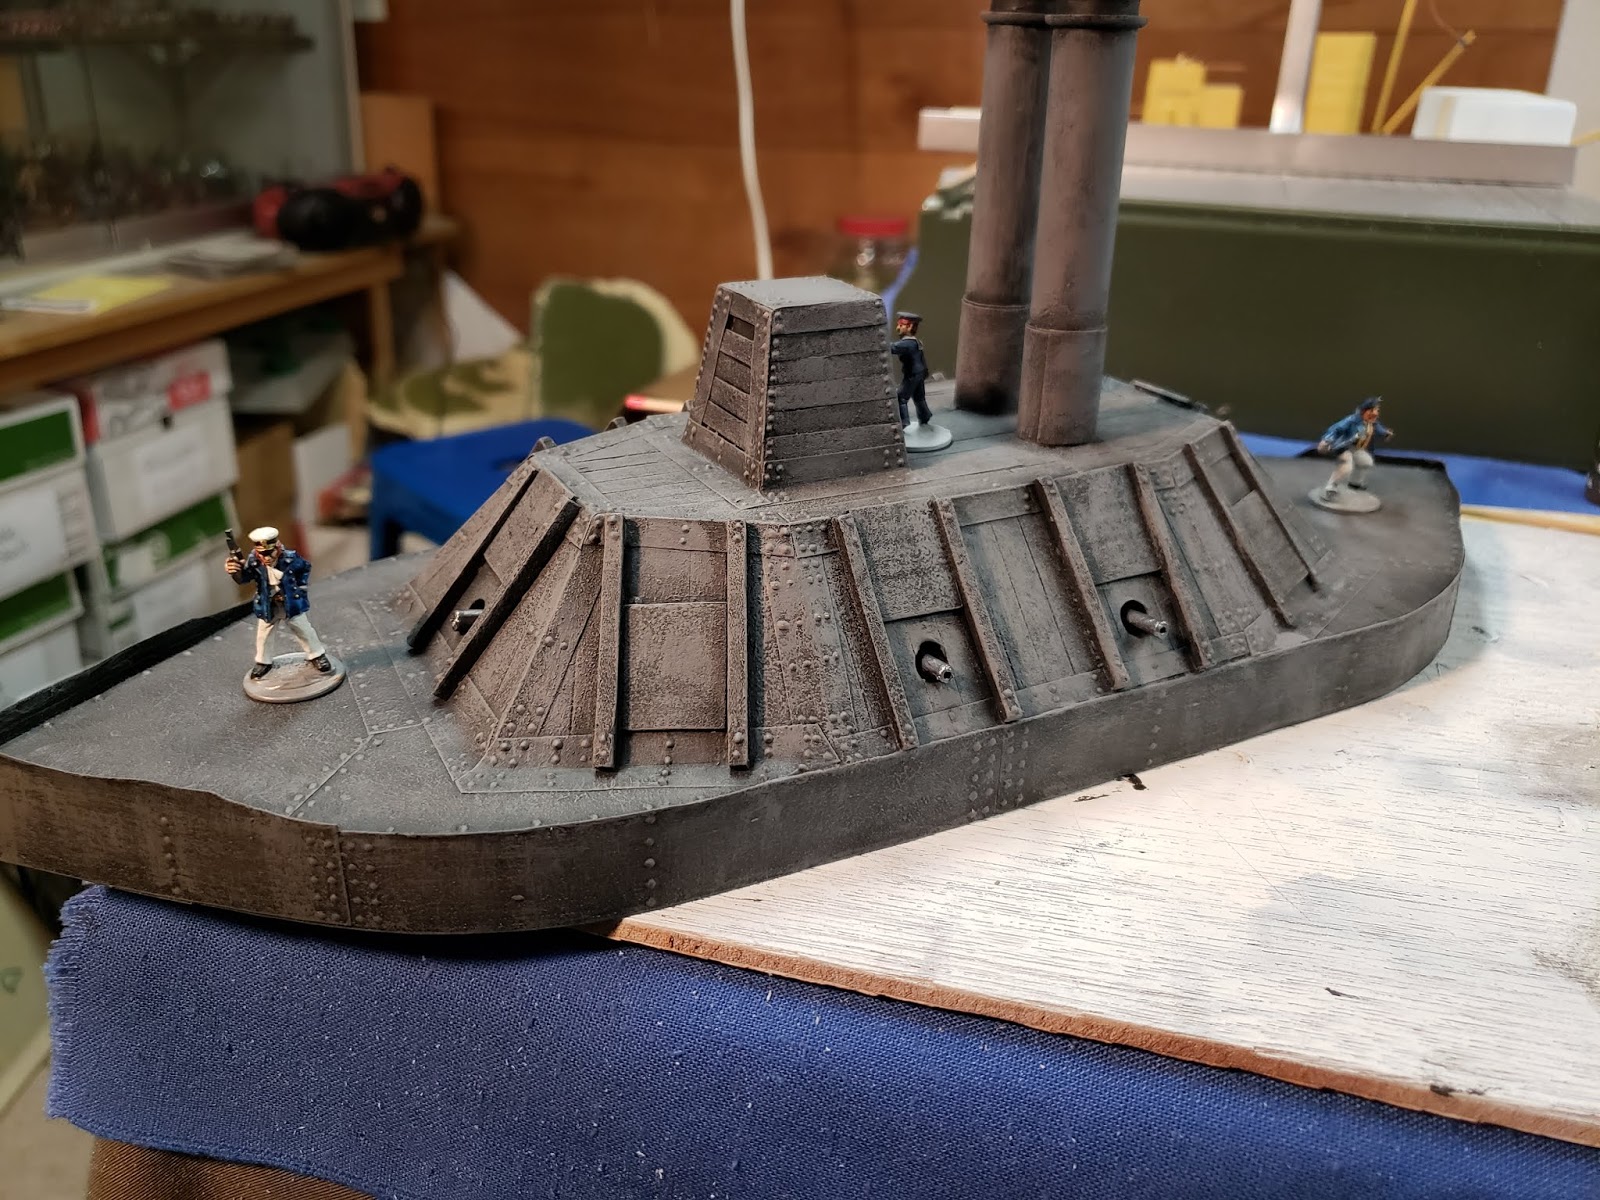
finally a drybrush of light gray

it still looks a bit dark

at least the light gray picked up the rivets

28mm crew figures from a number of different sources
I might just build a monitor to go with it...........
Great looking accidental ACW ironclad! Lovely build and finish!
ReplyDeleteBest Iain
Nice work Buddy. I thought to could see fumes raising up from you part of town. Surprised you didn't make a WW1 German UBoat for your Kaiser Army.
ReplyDeleteBeautiful model! What are your rivets made from?
ReplyDeletePuffy T-shirt paint, http://antonswargame.blogspot.com/2015/02/making-rivets.html
ReplyDeleteit is like ultra-thick acrylic paint
wow!!!! Fantastic work. You sir...........are a military genius! Simple and clever. Thank you for sharing
ReplyDeletebeautiful ironclad ships! Did you really go to Sparticon19 in Lansing, Michigan? If I would had seem your post earlier, I would had come to play!!
ReplyDelete
ReplyDeleteI like how u layered your paint, bringing out your detail. I tried out your 3X5 cards to make armor plating. Its working out pretty good. Thanks for the idea.
Just use plenty of wood glue, it stiffens the card and helps protect the soft blue bard underneath.
DeleteI did run the big boats at Spartacon 2019, they are going into mothballs for a while but I will be sure to post their next outing