FFW has been marketed under many different names over the years a fact more completely investigated at Swanny's Models site. It can be had nearly worldwide. My quart-sized container has lasted me for several years now. It is wonderful stuff and dirt cheap.
this is the version that I have
The first order of business is to examine you decals to see how large the clear section surrounding the colored image is, some decals are very good about keeping the clear bit to a minimum, I have seen others where the clear film covers the entire sheet and they leave it up to you to cut the decal out. The clear film is what shows up as "silvering" if you try to stick the decal on a matte surface as it does not make full contact with the surface.
To avoid silvering you need a gloss surface in the area that you intend to place the decal, this is where the FFW comes into play. First you put a brushload of FFW in the area that you will be placing the decal, this will give you a perfectly glossy surface for the decal to adhere to.
While the FFW is setting you place you decal in some warm water to dissolve the glue, you should be able to spot the clear film as the water soaks the decal paper as it will be slower to absorb the water creating a lighter zone around the image. Nudge the decal gently with the tip of a soft paintbrush, when it moves freely on the paper it is ready to be lifted and placed on the model. I use a soft round brush to gently roll the decal off the backing paper and onto the brush, hopefully image side out.
The decal will cling to the brush due to the surface tension of the water and can be lifted away from the backing paper. Do this carefully as decals are very thin and pretty fragile.
Once you have the decal on your brush you unroll the decal onto the glossy area that you have prepared with the FFW. It will be floating in a drop of water at this point and is unlikely to be exactly where you want it. Quickly wipe your brush almost dry on a towel and then use it to mop up the extra water on the surface this will settle the decal onto the area that you want it. After you have wiped the brush again you can use the tip to gently push the decal into place.
With a damp paper towel press the decal onto the surface to ensure that it conforms to any surface details and contours, this will also remove more water from the surface.
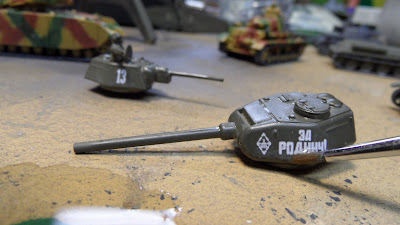
Now the decal is fixed in place with an additional coat of FFW, this seals the decal against the surface and helps to hide the edge of the clear film on the surface of the model, you can thin the FFW with water if you are concerned about the amount of surface build-up you are getting on particularly tiny models.
There you have it, your decals will look like they were painted on and will never come off given normal wargaming handling, some of my models have survived beer, soda and wine being spilled on them with no adverse effects.
Keep Painting, John


This comment has been removed by a blog administrator.
ReplyDelete