This being a game surface and not a diorama another significant concern was maintaining playability. Too often in the past I have made good-looking terrain only to find that the minis could not stand on it. I tried to keep a careful eye on the modelling process to ensure that the surface remained usable. To get a random placement of shell holes I took a handful of pennies and nickles and tossed them at the playing surface from about four feet away. The pennies marked the location of the smaller caliber shells, the nickels the larger ones. If a nickle landed face down it was a medium shell, face up indicated a heavy shell. I marked the locations with Sharpie and got to work. Below you will find the step-by=step on how I made the holes. Following the photos are two (crappy) videos of me making more holes, I lost my tripod so I ended up shooting these freehand with my left hand while trying to do the work with my right, the results are as bad as you would expect. They do seem to get the idea across, but I am buying another tripod!
Click on the photos for a larger view
.
enough holes to look embattled, not too many to play over (I hope!)
I made some of the holes breach the edges of the trenches, I will add rubble later
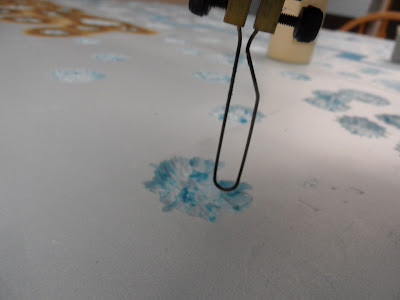
smaller holes were made using the heat from the tip of the tool to melt the plastic foam
as the heat opens the cells the gas escapes and the plastic shrinks away
to widen the hole I make an X then another one 45 degrees off
to delineate the overall area of the hole
then I fill in the gaps, melting the foam away with the hot tip
small nodules of melted plastic will form,
sweep them to the bottom of the hole with the tip of the tool for later removal
once they have cooled you can break them loose with your fingertip and sweep them away
cutting a larger hole requires slicing away the foam and removing chunks
cut around in a circle, keeping the tip in the center point, where the shell struck
as you cut you can remove parts of the foam
the last bit awaiting removal
Now that we have shell holes everywhere we need to add the ring of ejected soil that surrounds every shell hole. I have two ways of doing this, but I have never worked on a project this size before so I will try both and decide which one I will use to complete the project after I see how much time and effort each one involves.
the first method is the tried and true wood glue and sand
don't be an idiot (like me) and add sand before you have all of your glue down,
the sand gets everywhere and sticks to the nozzle
one section done, two more to go
done, be liberal with the sand, it will be providing almost all of you vertical dimension,
as the glue dries it shrinks
the No Man's Land boards have shell-holes mostly at one end
the next method exploits a property of one of my favorite glues, Gorilla Glue,
this stuff is tough, fast-setting and strong, it also expands by foaming up as it dries
moisten the surface before applying the glue,
this is tough as the blue board is smooth styrene, I sanded a little with some 80 grit
the glue will slowly begin to expand
I also tried this on some areas that I had sanded with the wood glue earlier
I moistened the sand before adding the Gorilla Glue and then more sand
spread the glue thinly over the moistened sand
you are looking for a thin glaze of glue
you don't have to load on the sand as the glue will expand,
providing the extra dimension you need
in about fifteen minutes or so the glue will have expanded
if the glue rises too much you can press it down with your fingertip,
you should probably use gloves like it says on the bottle as the glue is very sticky at this point
there was enough sand on it to keep from sticking to my finger
lightly sand for the most rise
wood glue and sand does not rise very high, perhaps 1/16"-3/32" or so
you can add more layers of glue and sand as you see fit
Gorilla Glue, it creates about an 1/8th of an inch in height
it also has a neat texture that looks good to me
Here are the two videos; one is one making small shell holes the other on larger ones. Somebody pointed out to me that a soldering iron would work as well for this sort of thing, I am not certain of the ignition point of blue board so BE CAREFUL if you are crazy enough to try that method!


Can't way to see more. Some where buried in boxes in the basement I another set of WWI trench warfare rules. Along with was a set of rules for the Aussie Cav in the middle east fighting the turks. Like the idea of gorilla glue. Best glue around today.
ReplyDeleteComing along really well. Great stuff.
ReplyDeleteVery nice.
ReplyDeleteI used a fork to dig out my craters and used the bit of foam dug out to build up the crater lips before applying sand.
http://baconfatblog.blogspot.com/search/label/trench
Baconfat