
Fort Pulaski as seen by Google Earth
Another example of the U.S. Third System forts that predated the U.S. Civil War. Construction began in 1829 and was completed in 1847 using approximately 25 million bricks. Located on an island in the middle of the Savannah River Fort Pulaski blocked naval access to the city of Savannah and the interior, the coastal area being very swampy with a few barren sand islands along the Atlantic Ocean. At the beginning of the Civil War there were two caretakers "manning" the fort and it was easily taken by a force of Georgia troops with out firing a shot. After Georgia seceded in February 1861 the fort was turned over to CSA troops.
One of the great problems in stealing a fortress from the government that built it is that the prior owner is apt to have a complete set of plans and be intimately familiar with the weaknesses of said fortress. This, joined with the massive advances in cannon technology in the period since the fort's design, meant that the Union was at a distinct advantage in their efforts to recapture the fort. Fortresses of the Third System were designed prior to the widespread adoption of rifled cannons, guns which had substantially longer range and far greater accuracy than the more common smoothbore guns on the 1820's. The Union forces began firing on Fort Pulaski on 10APR1862 and by the next afternoon had shot a huge hole in the outer face of the fort and had managed to place a shot onto the magazine located in the wall on the opposite side of the fort. Realizing that he and his men were sitting in what amounted a massive bomb (there were 10,000 pounds of black powder in that magazine) the Confederate commander surrendered. For a much more detailed report on the siege of Fort Pulaski check this Wikipedia page.

Cockspur Island, the fort is located to the right of the bridge that connects to the mainland,
it is easy to see how the fort dominates both channels of the Savannah River

a larger view, the Union forces landed on Tybee Island (far right of picture)
and could batter the fort with rifled cannon from there
Outside the Fort
west of the point of the demilune, facing east along the northern face of the demilune

panning south across the face of the demilune

facing dead east,
the original demilune had a much more regular appearance,
the irregular earthen mounds were later additions to the fort

looking east along the southern face of the demilune

looking northwest at the southern face of the demilune

looking north at the southern face of the demilune

this is most likely what the demilune looked like originally

looking northeast toward the sally port bridge

looking east at the southern face of the demilune with the fort in the background

looking north into the bridge of the sallyport

I was told that the large earthen mounds were raised to protect the masonry walls of the fort
and to provide space for subterranean bombproofs

the easternmost end of the southern face of the demilune

the southwest corner of the fort

a closer view of the same

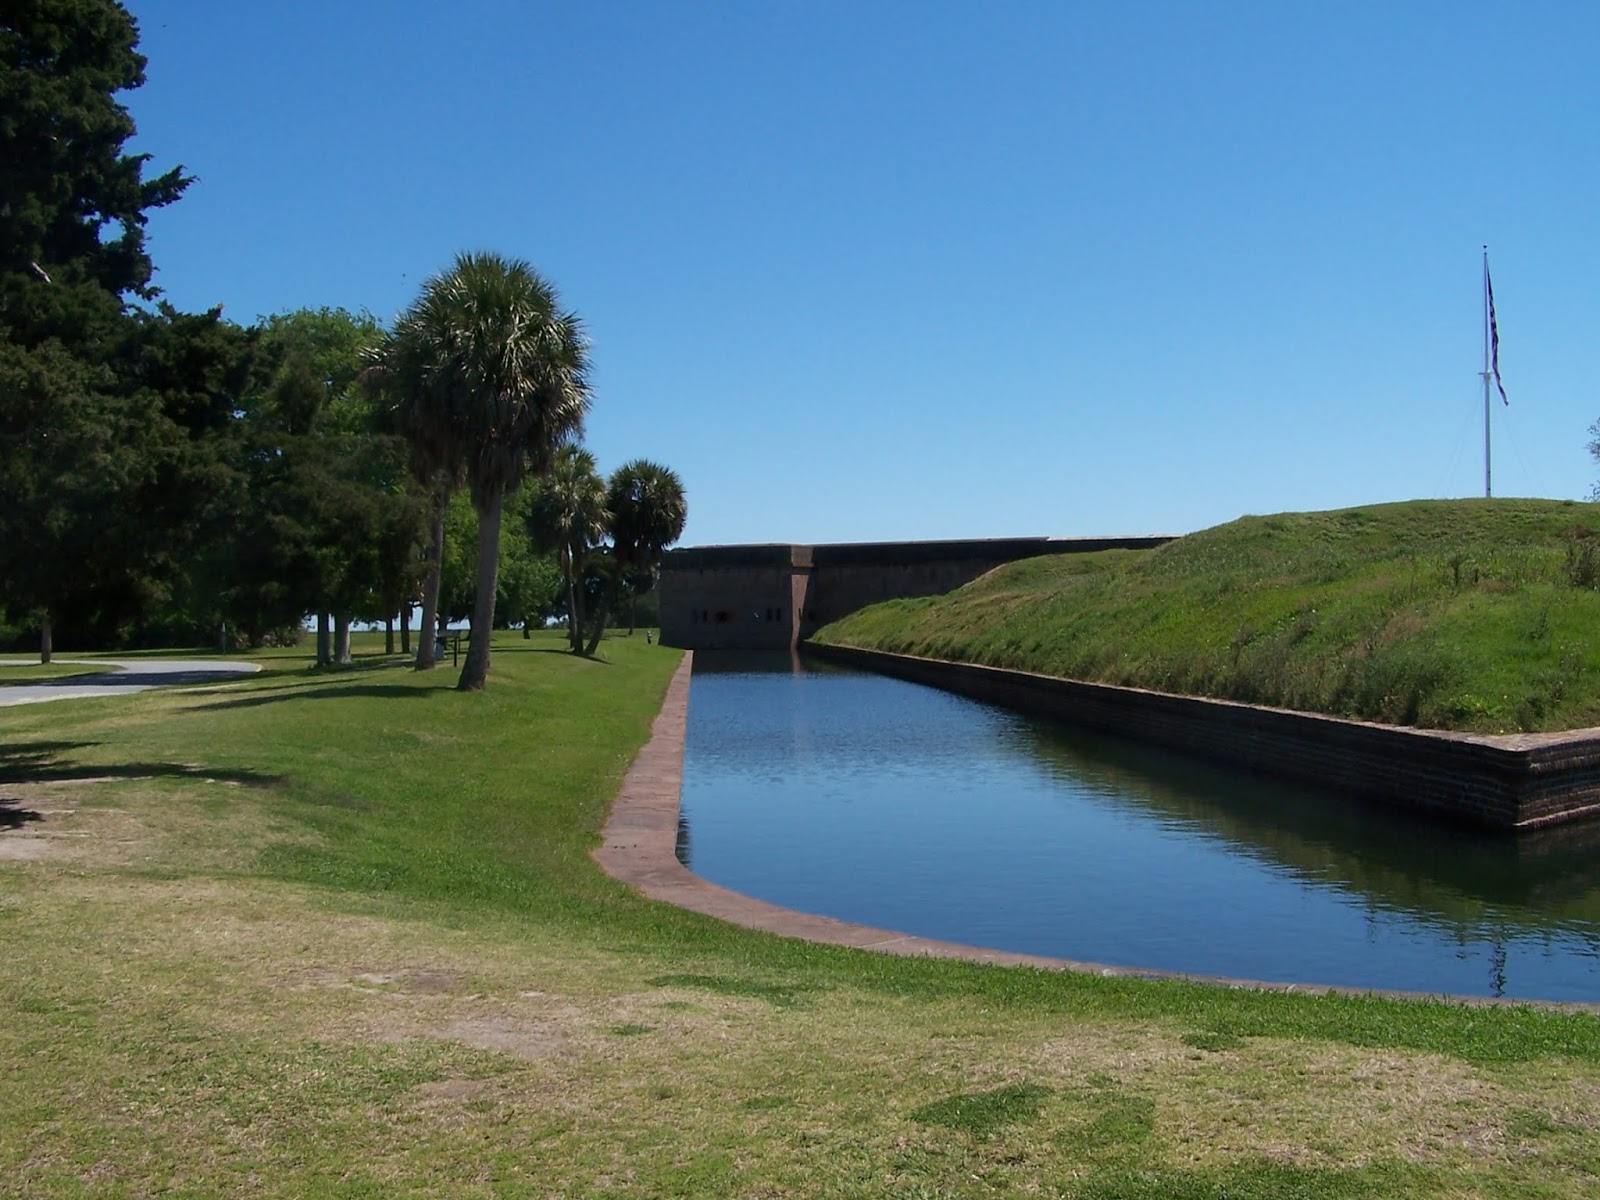
the fort was designed to have a wet moat, to keep it supplied with
flowing water a canal was dug to connect it to the Savannah River

it was a very dry year when I went and the canal was nearly dry

close-up of a cannon port and a rifle slit
covering the moat and main entrance to the fort

the western bastions had cannon and rifle slits to cover the entrance
from both sides and to cover the flanks of the demilune,
there are no cannon ports in the western face as it is covered by the demilune

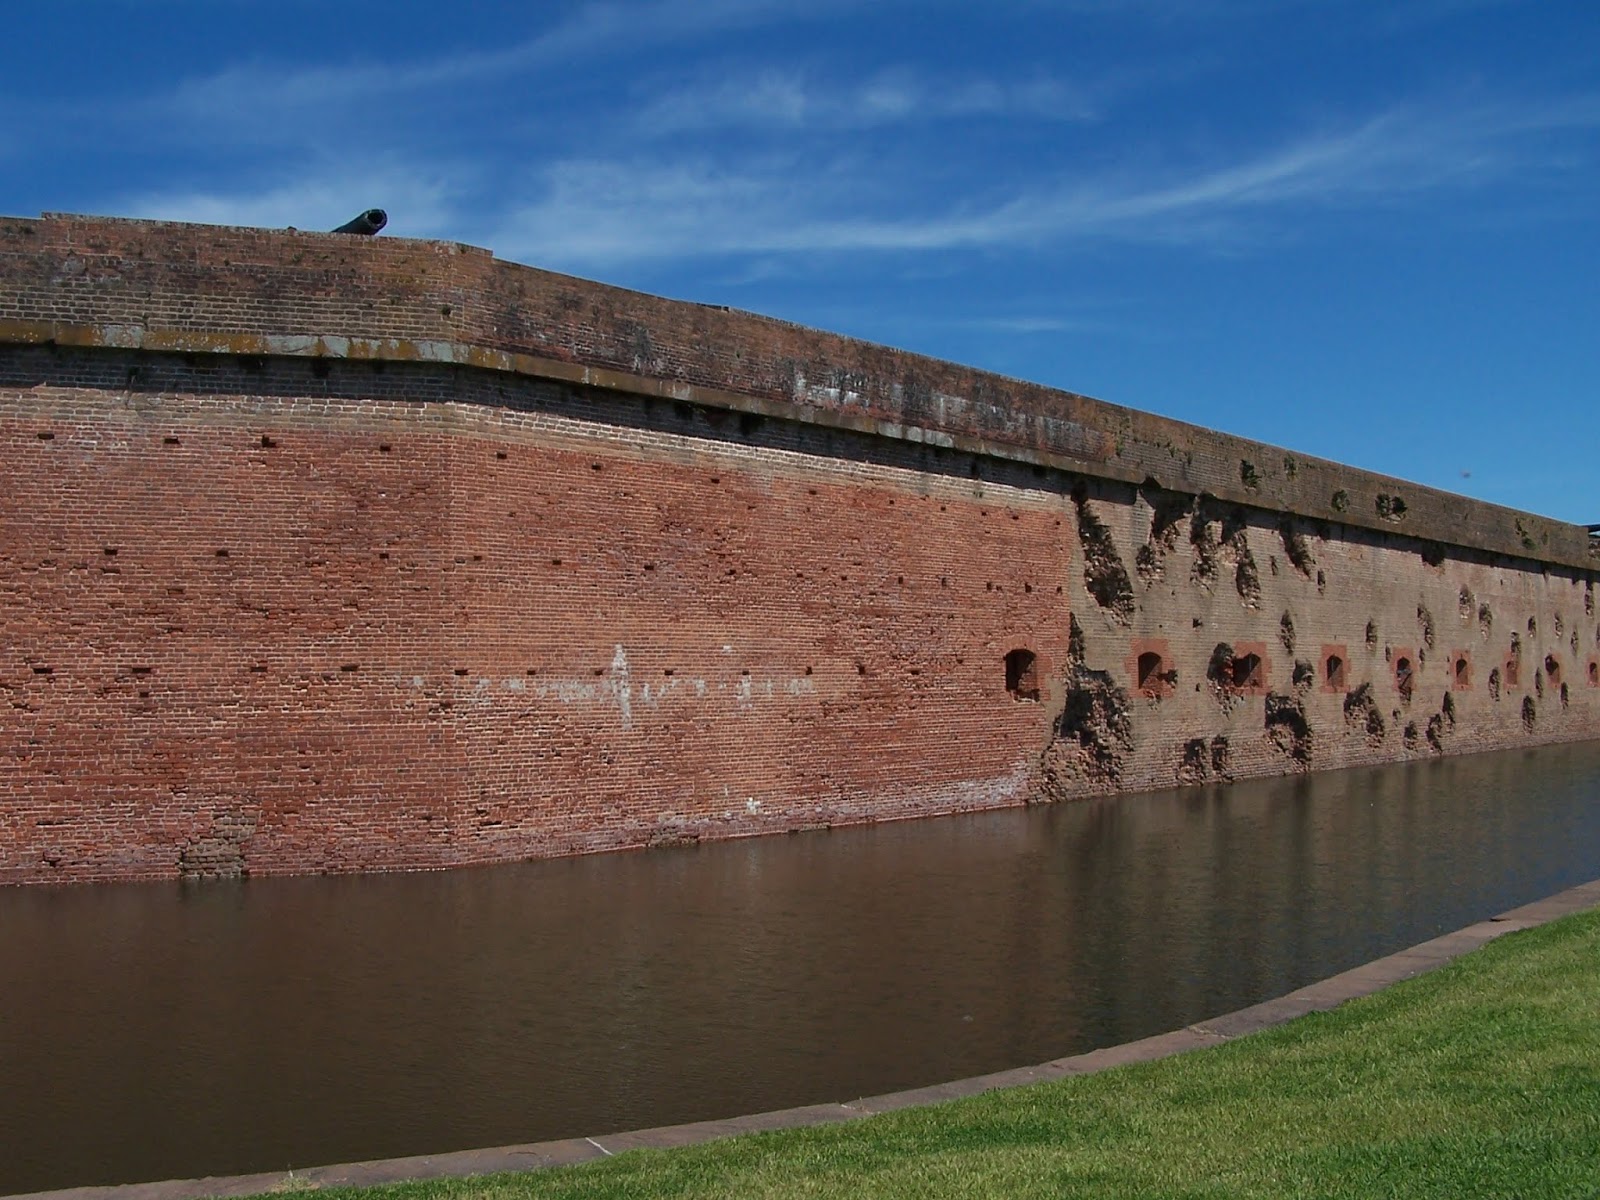
a view from the south of the western wall and moat

the south wall from the southwestern corner of the moat

shell damage to the southern wall


the southeastern corner was battered particularly hard, this is where
the hole was created that allowed the shell to strike the magazine in the opposite corner of the fort

damage that did not impact the soundness of the structure was left un-repaired

the southeastern corner suffered massive amounts of damage
and was repaired to make the fort serviceable after it was captured by the Union forces
notice the red bricks on the right side of the photo

the picture in the lower left shows the condition of the wall after the fort surrendered

period photos of the size of the hole in the corner

a view from the moat looking southwest at the damage

a map of the Union batteries courtesy of the NPS

a view west along the south wall from the southeast corner of the maot

a similar view but incorporating a part of the repaired southeast corner

the southeast corner, the red brick is the repaired area
the extent of the repairs becomes noticeable as you look north along the southeast face of the fort

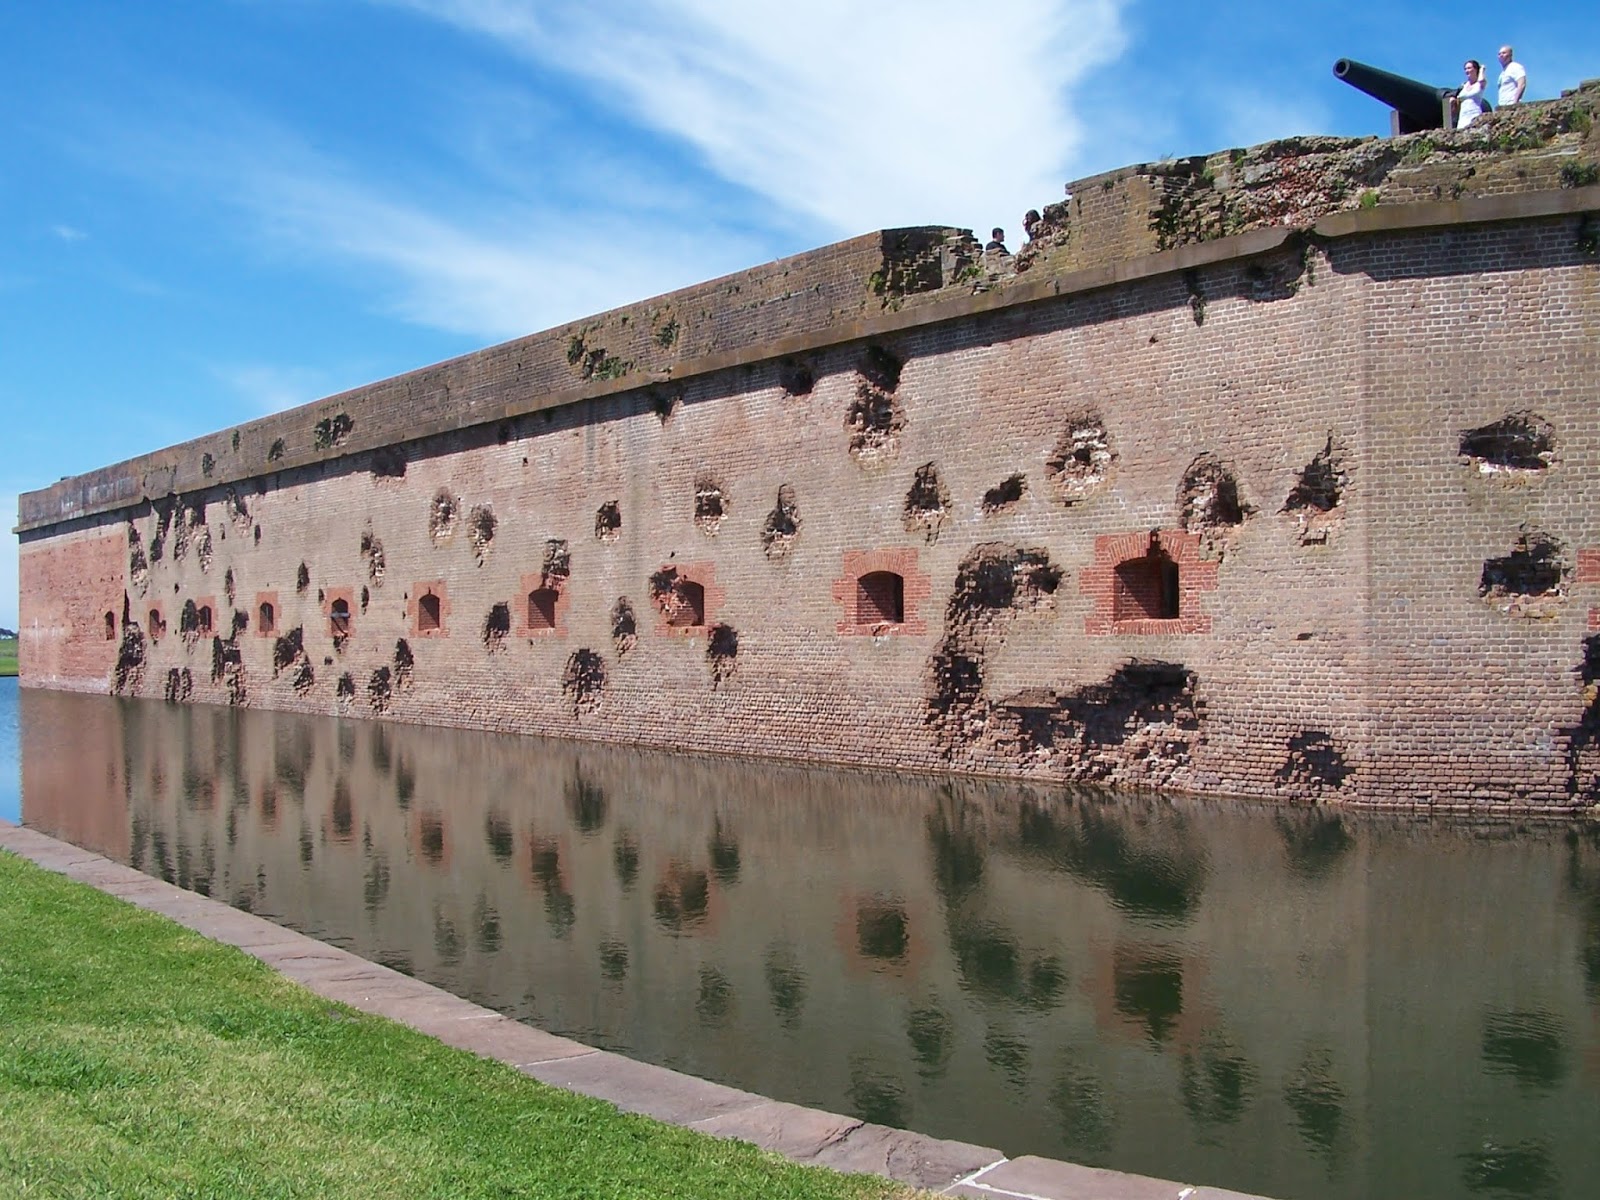
the southeast face of the fort from the southeast corner of the moat

this face of the fort suffered the most damage from the Union guns

the middle of the southeast face of the fort

the eastern corner of the fort

the northeast wall from the eastern corner of the moat

it is nearly pristine

damage to the parapet was caused by Union guns firing at the Confederate guns mounted there

the Confederate rifled guns gave the Union batteries a lively fight

notice that there is supposed to be a lower-level cannon port in the corner face
(the repaired section does not have this feature)
a view to the south from the eastern corner of the moat

to the left of the picture you can get an idea of how incredibly flat the Tidewater country is

an undamaged gonport

the northern face of the fort from the northeastern corner of the moat

same location panning east and south

the face of the northeastern corner

panning further east to include part of the northeast wall

looking southeast from the northeast corner of the moat

the northern wall of the fort

the northwest corner of the fort with the demilune in the background

looking back to the east along the north face of the fort from the northwest corner of the moat

the moat in front of the northern face of the demilune from the northwestern corner of the moat
Into the Demilune

the chainfall to raise the drawbridge of the demilune

an entrance to one of the underground shelters,
the extremely high water table demanded that these be dug
into artificial hills that had been raised inside the demilune
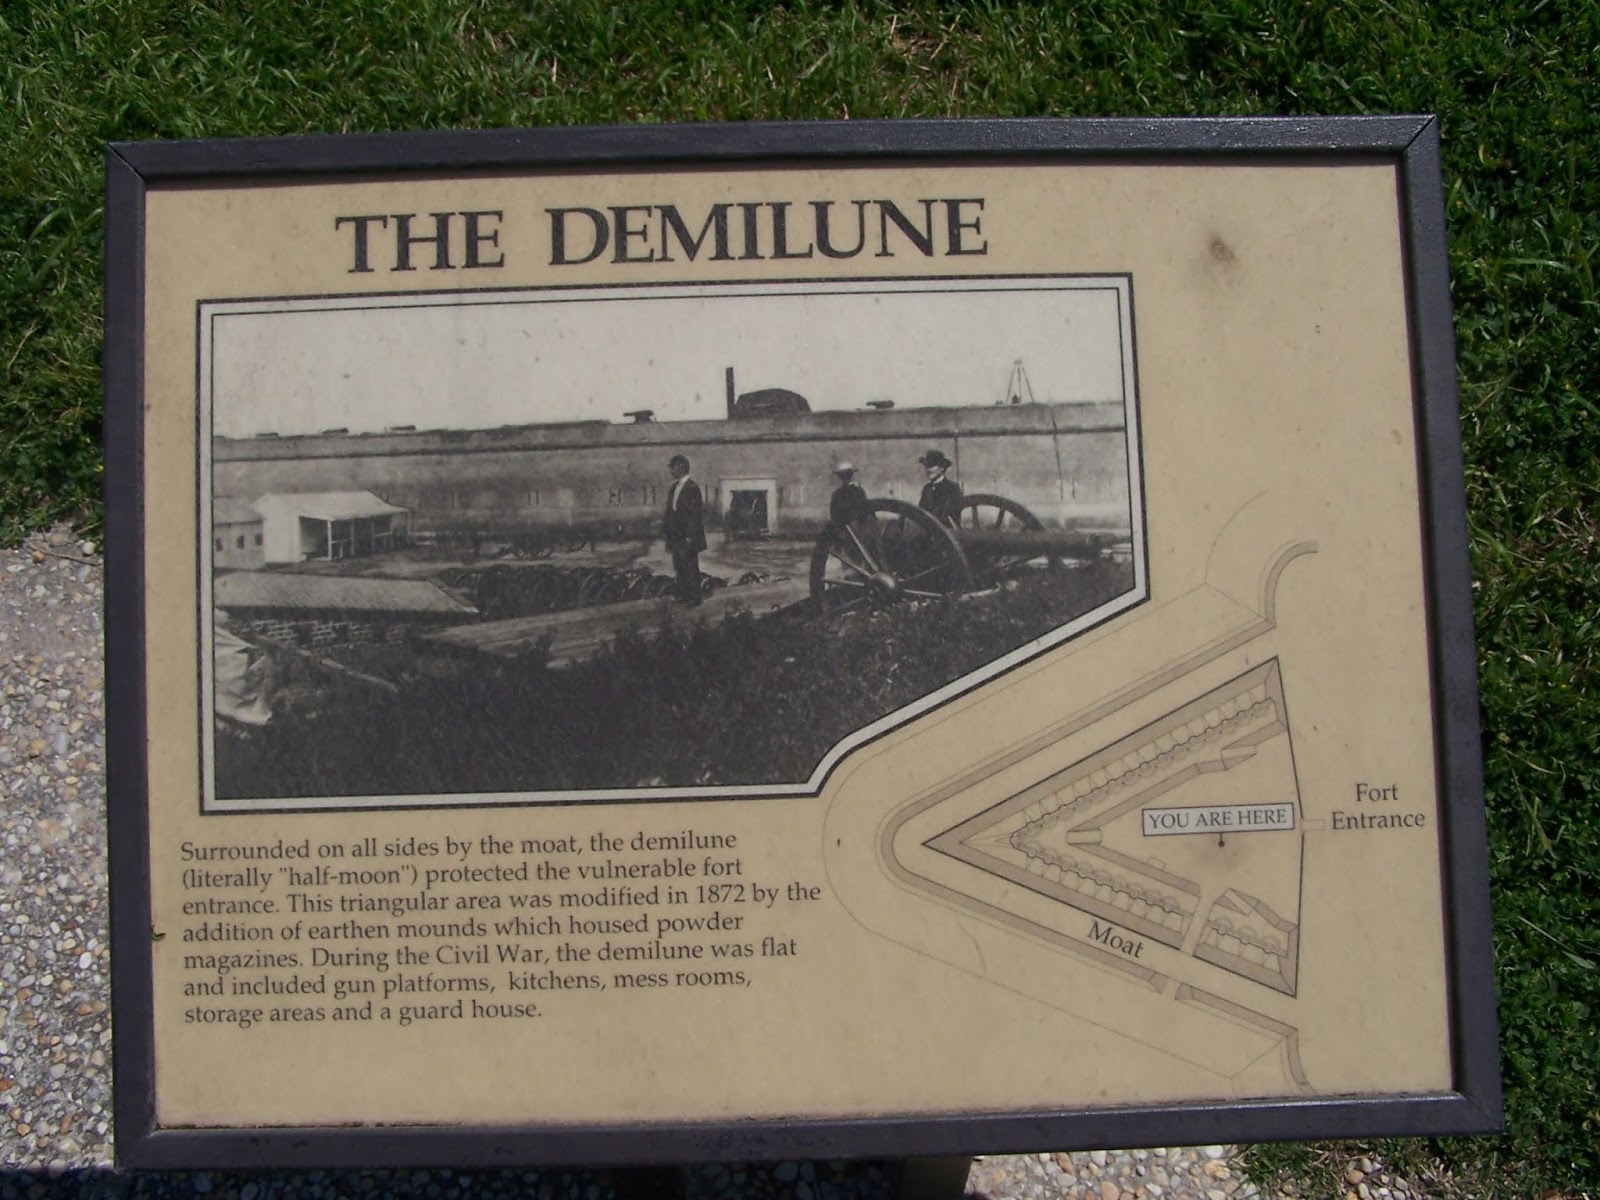
informational plaque

more shelters in the demilune,
these were to protect soldiers and ammunition from bombardment
Inside the Fort

the view from the demilune into the main entrance of the fort

a pair of massive doors sealed both the exterior and interior ends of the gate

counterweighted chain that lifts the drawbridge

a field gun facing the entrance in case the demilune, moat
and multiple heavy doors fail to stop unwelcome visitors

looking back toward the entrance from the position of the field gun

the interior of one of the bombproofs, these were originally closed with heavy wooden doors

a gun position with a cannon mounted

the angled mount helped absorb the recoil energy
and held the gun in a position to be relo0aded

there would be an array of ropes and trailspikes so the
crew could the return the gun to a battery position before firing

the years between my expedition to Fort Pulaski and now have seen my notebook go missing so I'm not sure what type of cannon these are, if a reader knows please advise and I will update this caption


the entire interior was whitewashed to help visibility,
for obvious reasons it was desirable to limit the number of oil-lamps in this environment
heavy wooden partitions separated the gun bays


each gun bay was closed at the rear with a wooden wall, the doors allowed access
for the crew while the upper openings helped dispel smoke from the cannons

a view along the parapet of the southeastern wall

a few original cannon remain mounted, this is a Brooke rifle


again you see in the distance how flat the countryside is, just a few feet above sea level

a Blakely Rifle


NPS staff in period uniform demonstrating rifle drill

a longer view of the same cannon

the remains of a gun mount


the pin that the mount turned on

an incredibly simple idea but largely effective

again the incline of the carriage helps absorb the recoil
(as does the massive weight of the cannon itself)

a view down into the parade ground from the top of the wall

looking at the northwest magazine from the top of the wall

the stairway down to the magazine from the top of the wall, I can't imagine
trying to carry heavy shells up this steep stairway while under bombardment

ventilation was crucial when storing black powder under
the semitropical conditions of a Georgia summer

metal roofs and extensive guttering took care of the torrential
downpours common during hurricane season

more of those stairs

damage to the inside of the western parapet from overshots fired at the eastern wall

the base of those stairs

entering into the parade ground from the stairwell in the northwestern corner of the fort

each gun bay was numbered

large limbers for moving the huge cannon barrels

informational plaque

the entry to the magazine

a cannon facing the western moat and covering the entrance

the view over the gun

rifle slits

a close-up look through a rifle slit

the magazine (no, there isn't really gunpowder in those barrels, I asked)

that would make one heck of a firecracker!

passageway to the magazine

informational plaque

counterweights on the chainfall


the duty watch's office next the the entry gate
Inside the Demilune (again)

a view outward from inside a bombproof in the demilune

brick reinforced firing steps


bombproof entrance

these also acted as passageways from the inside of the demilune
to the firing steps along the perimeter


the inside of the demilune is a confusing rabbit warren of earthworks and bombproofs


looking east toward the main entrance from inside the demilune

and south across the flats from a firing step on the south face of the demilune

a very nice cutaway model of a section of the fort
(encased in that pestilential glass cabinet that thwarts photography)

This is another fort well worth a visit, as is the nearby Fort James Jackson, both are within a short drive of one another. Do plan to visit away from the summer months as the heat can be brutal between June and September. Savannah itself is a beautiful town rich in history, with many historic homes and wonderful neighborhood parks, and deserves a couple of days too.
Excellent set of photos. Plenty of great source material for anyone wanted to scratch build a fortress. Love the pics of the guns in situ.
ReplyDeleteWell worth a visit. I haven't been since the extensive flooding from a hurricane a few years ago so don't know how much damage is left from that. Much better preserved as a Civil War period coastal fortification than Fort Sumter or Fort Warren (Boston) which are the contemporaries I've visited.
ReplyDeleteI think the main Confederate disadvantage was that the masonry fortifications just weren't up to the technological advance of rifling for artillery more than the Union having detailed plans of the fort. The vulnerability to rifled guns and the availability of land where they could be deployed to attack the fort were what did Ft. Pulaski in IMHO.
Note that the drainage system for the area during fort construction was designed by a young engineer named Robert E. Lee.
Anton, this is a great photo report. Thanks so much!
ReplyDeleteJim
Great stuff. Here is link to my pictures from Sept 2013. https://gary-oldsargeswargameandmodelblog.blogspot.com/2013/09/visit-to-fort-pulaski-outside-savannah.html
ReplyDeleteThey do a fantastic Christmas lantern tour in December at Pulaski. I've been many times, and as you intimated, the weather is a whole lot better!
ReplyDelete