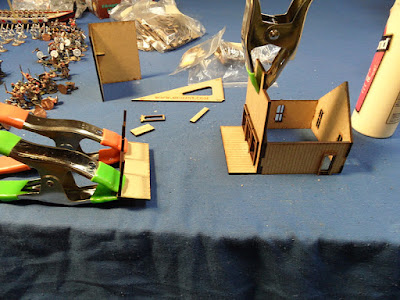
I dutifully began painting faces on Vikings but the lure of the finely crafted buildings kept capturing my imagination. In nearly no time at all I found myself gluing together the model I had test fitted a few days earlier. That sealed the deal and I decided the Vikings could wait another few days. With a decision in hand I grabbed my trusty camera to record the festivities and set to work on the models. I chose to use regular wood glue for the assembly as I have had spotty results with superglue on wood models and I hate fiddling with epoxies.
I chose another of the smaller/simpler models to assemble first. There is no designator or model number on the bags so I am just calling this one the Dry Goods Store (because it reminds me of one from Cross Roads Village , a local historical attraction of period homes and businesses). It is a single-story building with a false front and peaked roof. I chose to begin with the roof as the long narrow glue joint would require a bit of time before being stong enough to handle.
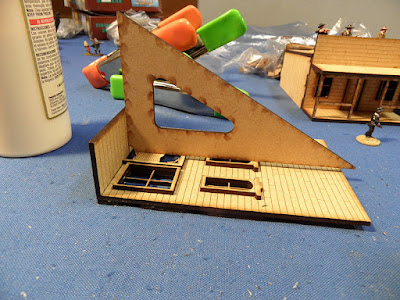
the handy square assured me that the roof was right
the front of the building has two parts,
the peaked inner wall and the the fancy false-front
these need to be glued together and aligned very precisely
once that is done the side walls may be added
it is important that the wood surfaces be covered with glue,
you can easily wipe up any glue that pushes out of the joints with a damp rag
with the walls in place all that is needed is the roof
even though the roof joint fitted perfectly I was concerned about the
strength of such a narrow joint so I added a bit of scrap to strengthen it a bit more
one of the advantages of wood glue is that it is tacky enough to fix small parts in place
without clamps or the need to hold them by hand
the door and window frames really make the model "pop"
they fit perfectly
the large windows have individual frames as well
see what I mean
even with top-quality wood products you can't avoid the rules,
I ended up having to stop for a bit and clamp the two large front pieces together while the glue dried,
I took advantage of the break to glue the porch roof and railing together, the giant clamps are probably overkill but my motto has always been "Too much is a good place to start"
while waiting for the glue to set I decided that the roof needed more strengthening,
so I added two more bits of scrap,
I positioned these at either end to keep the roof from slipping off the model
with the additional braces I finally felt happy with the roof
the Jail (left) the Dry Goods Store
Perry's and Old Glory figures for scale
Having completed the Dry Goods Store with little difficulty I decided to tackle a larger building, and what is more iconic of the the Old West than a Saloon? Well, nothing actually, so I popped open the bag with the Saloon and got down to work. Having learned (been reminded) my lesson about gluing large surfaces the very first thing that I did was to glue the inner wall of the front to the outside false-front and then clamp the daylights out of it, I then started on the rest of the model while that was drying.
I have more clamps, but this seemed enough
while the glue was drying I added the window and door frames to the walls,
this is much easier when they are laying flat
once the details were in place the walls went together quickly
it is just as well that GCMinis provided the triangle,
all of my Legos are buried under Christmas boxes in the storeroom
it is readily apparent which way the roof goes together,
you will want to look at the shingle patterned before you start gluing,
there is a definite "up" and "down" direction to the shingles
complete except for the roof
and there we go
you can get a feel for the bulk of this building
one side of the street is finished
I have to say this was the most fun that I have had in some time putting together model buildings. The fit and finish of this product is simply amazing and the completed models have exactly the right look. I can hardly wait to take a stab at painting these.
Very Highly Recommended, John


No comments:
Post a Comment