
the finished product is quite lovely
The majority of my buildings will be from a company called Empires at War (www.empiresatwar.co.uk hence forth 'EAW'). They have a wide range of 28mm buildings. as well as 15mm, 10mm, and even 6mm; these come from a wide range of gaming epochs, Roman to sci/fi.
I selected EAW's Spanish/Italian range for four basic reasons: the roof, the tiles, the height, and the finish. As an overall guiding idea in my choices was the fact that most of Rome's violence happened in middle to lower class areas. The Senatorials did not appreciate rioting in their gardens! First, the roofs. Most Roman middle and lower class building tended toward flat, or nearly flat roofs and most mdf building manufacturers like those peaked roofs too much to bother with accuracy. As far as I can see Sarissa, the primary other choice for these buildings, does not offer a single building with a flat roof. Second, the tiles that made up the roof. The standard Rome roofing tiles were an 'odd duck' by modern standards and no one does anything like them. They are not flat, and they are not curved like a modern 'Spanish tile roof', they are both. In a proper Roman tile roof, either flat or peaked, one side of the tile curves up, the other side curves down. The down curve from tile 'a' covers the up curve from tile 'b' locking the tiles in place and protecting the seam from leaks. This results in a roof that is at least 1/4 curved or arched like a modern tile roof and thus 3/4 flat. No gaming manufacturer makes that roof. EAW is the closest at about 50/50. I know that worrying about the roof so much (literally half of my decision) seems trivial, but wrong is wrong, and we are trying for a level of historical accuracy in these pursuits and having the first thing you see (the roofs are on top and the most colorful part) be really wrong just makes everything else off kilter from the start.
My third consideration was the height of the buildings. Sarissa offers no buildings taller than two floors. The city of Rome, on the other hand, allowed buildings as tall as FIVE stories! Many of Rome's five story building were actually legally built as three story buildings and then illegally modified into four or five story buildings after the fact. This led to building collapses being part of life, a part you wanted to avoid! EAW offers a range of three story buildings as you will see over these posts. The flat roof versions can then be modified higher if I desire or it is practicable (I believe the shorter buildings are a gaming consideration to allow players ease of accessing figures in play, but I do not think it is needed). My fourth consideration is the finish of the buildings. Sarissa buildings are unpainted, EAW buildings arrive already painted you just have to assemble them. Furthermore, the color selected for the finish of the range I am using is a beige color. It fits well with the color range for mid/lower class building colors in Rome as almost all buildings are stucco over bricks and cement.
Now on with the construction. I will start with the few slanted roof buildings I purchased.

Here is the Tavern as it arrived. The directions leave something to be desired but are functional.

This is the contents of the package splayed out for viewing.

Step one is gluing the two story front and back to the sides.

Next the directions show glue the first floor front façade in place.

While the exterior sets up glue the removable upstairs floor together.

And also assemble the roofs under sheathing.

While those piece set up return to the exterior shell and glue it down to the building base
"velut fundamentum aedificii est".

Next we return to the roof and EAW's intriguingly simple idea for the roof topper. A stick of balsa painted the appropriate color with some notches to match the tile lines.

Next is two plastic sheets glued in their places for the roof tiles.
Again the flat space should be wider, but "we takes what we can gets".

We now turn to gluing the balcony and first floor covered area roof into place.
The roof is again two pieces (the plastic is not big enough so be warned)
The balcony is four pieces (floor, front rail and two side rails).

It was at this point that I realized as I was blithely following the pictures, the pictures had never told me to glue in the front door and door frame (separate pieces). Now I had to figure out how to do that with roofs in the way! I managed to get it done, the frame being the hardest part as is shown in this photo. Always think as you follow the directions!

Balcony door and frame going into place, it is easy if you are not working in a one inch space!

Back door and frame in place, once again "easy peasy".

You then glue a post into each corner to hold up the second floor.

Then drop in the second floor, but be careful as in at least my kit the posts are too small and you have to be very careful in balancing the removable floor or you will drop it on the first floor. Not really a problem now, but if both floors are loaded with painted minis it could be alarming to the owner.

Finished tavern from the front.

Finished tavern from the back.
In addition to the tavern I also purchased two 3 story peaked roof buildings. so here is a short course in their construction.

The out of the package photo.

The front back and sides glued together.

Second floor balcony floor and front door/frame glued on.
Wax paper is a great thing to work on for white glue work in my opinion.

The balcony door has been glued (perhaps a bit exuberantly) in place by this point (I am skipping steps here for brevity sake) and now the 'boards' that will hold up the raised floor are glued in place. In this building they are more sturdy and do a MUCH better job than was the case in the tavern.

I include this picture of the building roof being glued together because the direction of both kits stated that the plastic roof pieces should be glued in place with both white glue and 'super glue'. I decided to smear some white glue around on the flat surface and use gorilla glue gel formula and the actual exposed roof brackets to lock the project together. We shall see how this lasts/works.
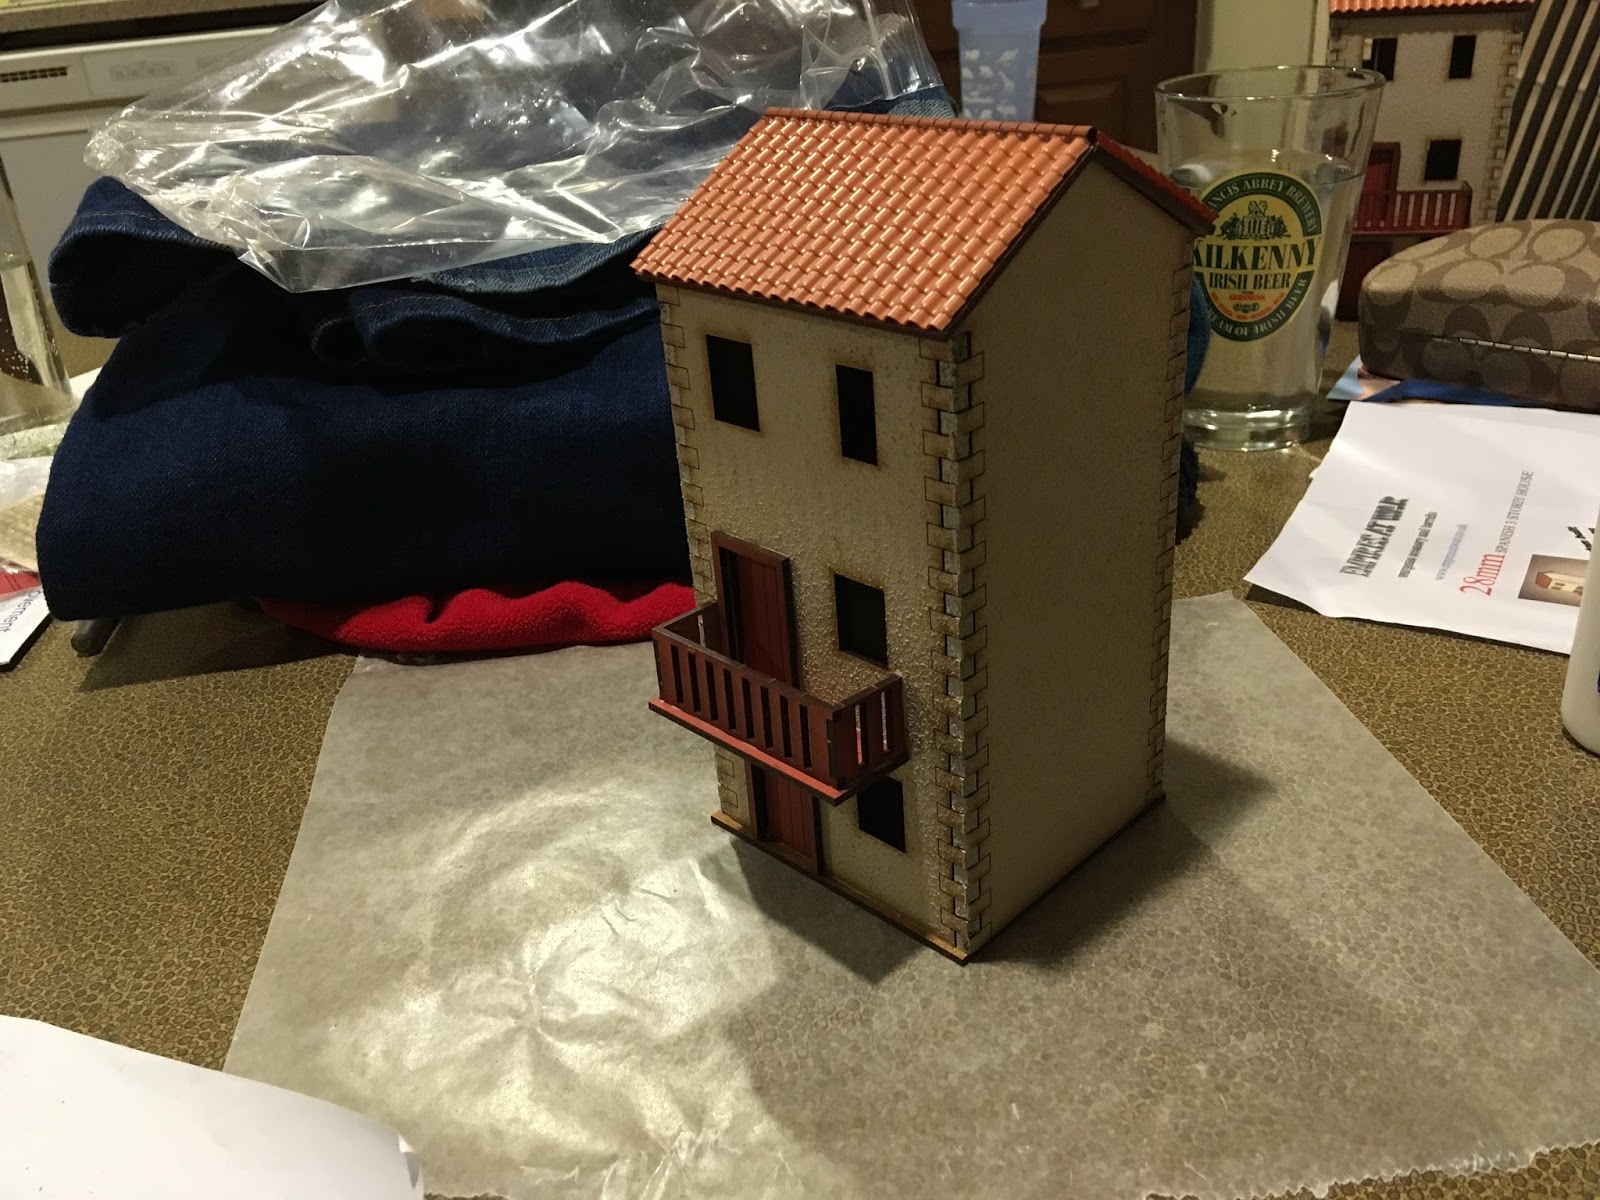
And voila! One micro apartment complex or comfortable one family home completed.
Now I only need housing for another million people or so ...

And finally here we see a side of a piazza with
two micro apartment buildings and a tavern between them.
Over all these building go together easily although there are some issues with the instructions and there was one problem with the construction (tavern second floor). In the final analysis, these buildings are easier than 4ground's stuff, only require building so are better than Sarissa. And cost less than either of the other two. So I would say they are well worth the investment if you are looking for some buildings for your gaming .
Anton we are WELL on the way to a proper Spanish city for your Castillo/pirate games.
The Housemartin
Nice review of the buildings.
ReplyDeleteGreat looking buildings!
ReplyDeleteVery nice, I'm looking to get these in 15mm this spring, being very happy with the ECW-esque buildings I got last year from them.
ReplyDeleteNice post! I liked the walk through and review. I was not aware of this manufacturer. 😀
ReplyDelete