Having completed the WW1 German tank hunters I didn't much feel like painting any minis for a little while and, lacking the need for additional terrain, I was at a loss for something to turn my hand to. Without a wargaming project I decided to take a pass at Mount Plastic; an entirely unscientific method brought me to choose an LS model of the KI-15 "Babs" that was sitting on the top of the "Spats" pile.


a very straightforward model

the surface detail is excellent

panel lines are inscribed and delicate

parts fit is superb, mind you this kit is forty-five years old!

cockpit detail is sparse but would be difficult so see under any circumstances

an elegant layout, almost like a single-engine DC-3

and just look at those spats!

a quick coat of flat white to provide a base to paint on

you can see how superb the parts fit is,
absolutely no filler anywhere on this kit

the Imperial army had a very simple camo scheme early-on

the worst part of this project was waiting for the paint to dry

looks like a close cousin to the Northrop Gamma

a quick coat of gloss floor wax

the decals are truly disappointing, the color is good but they are
thick and have a pronounced surround that is cloudy
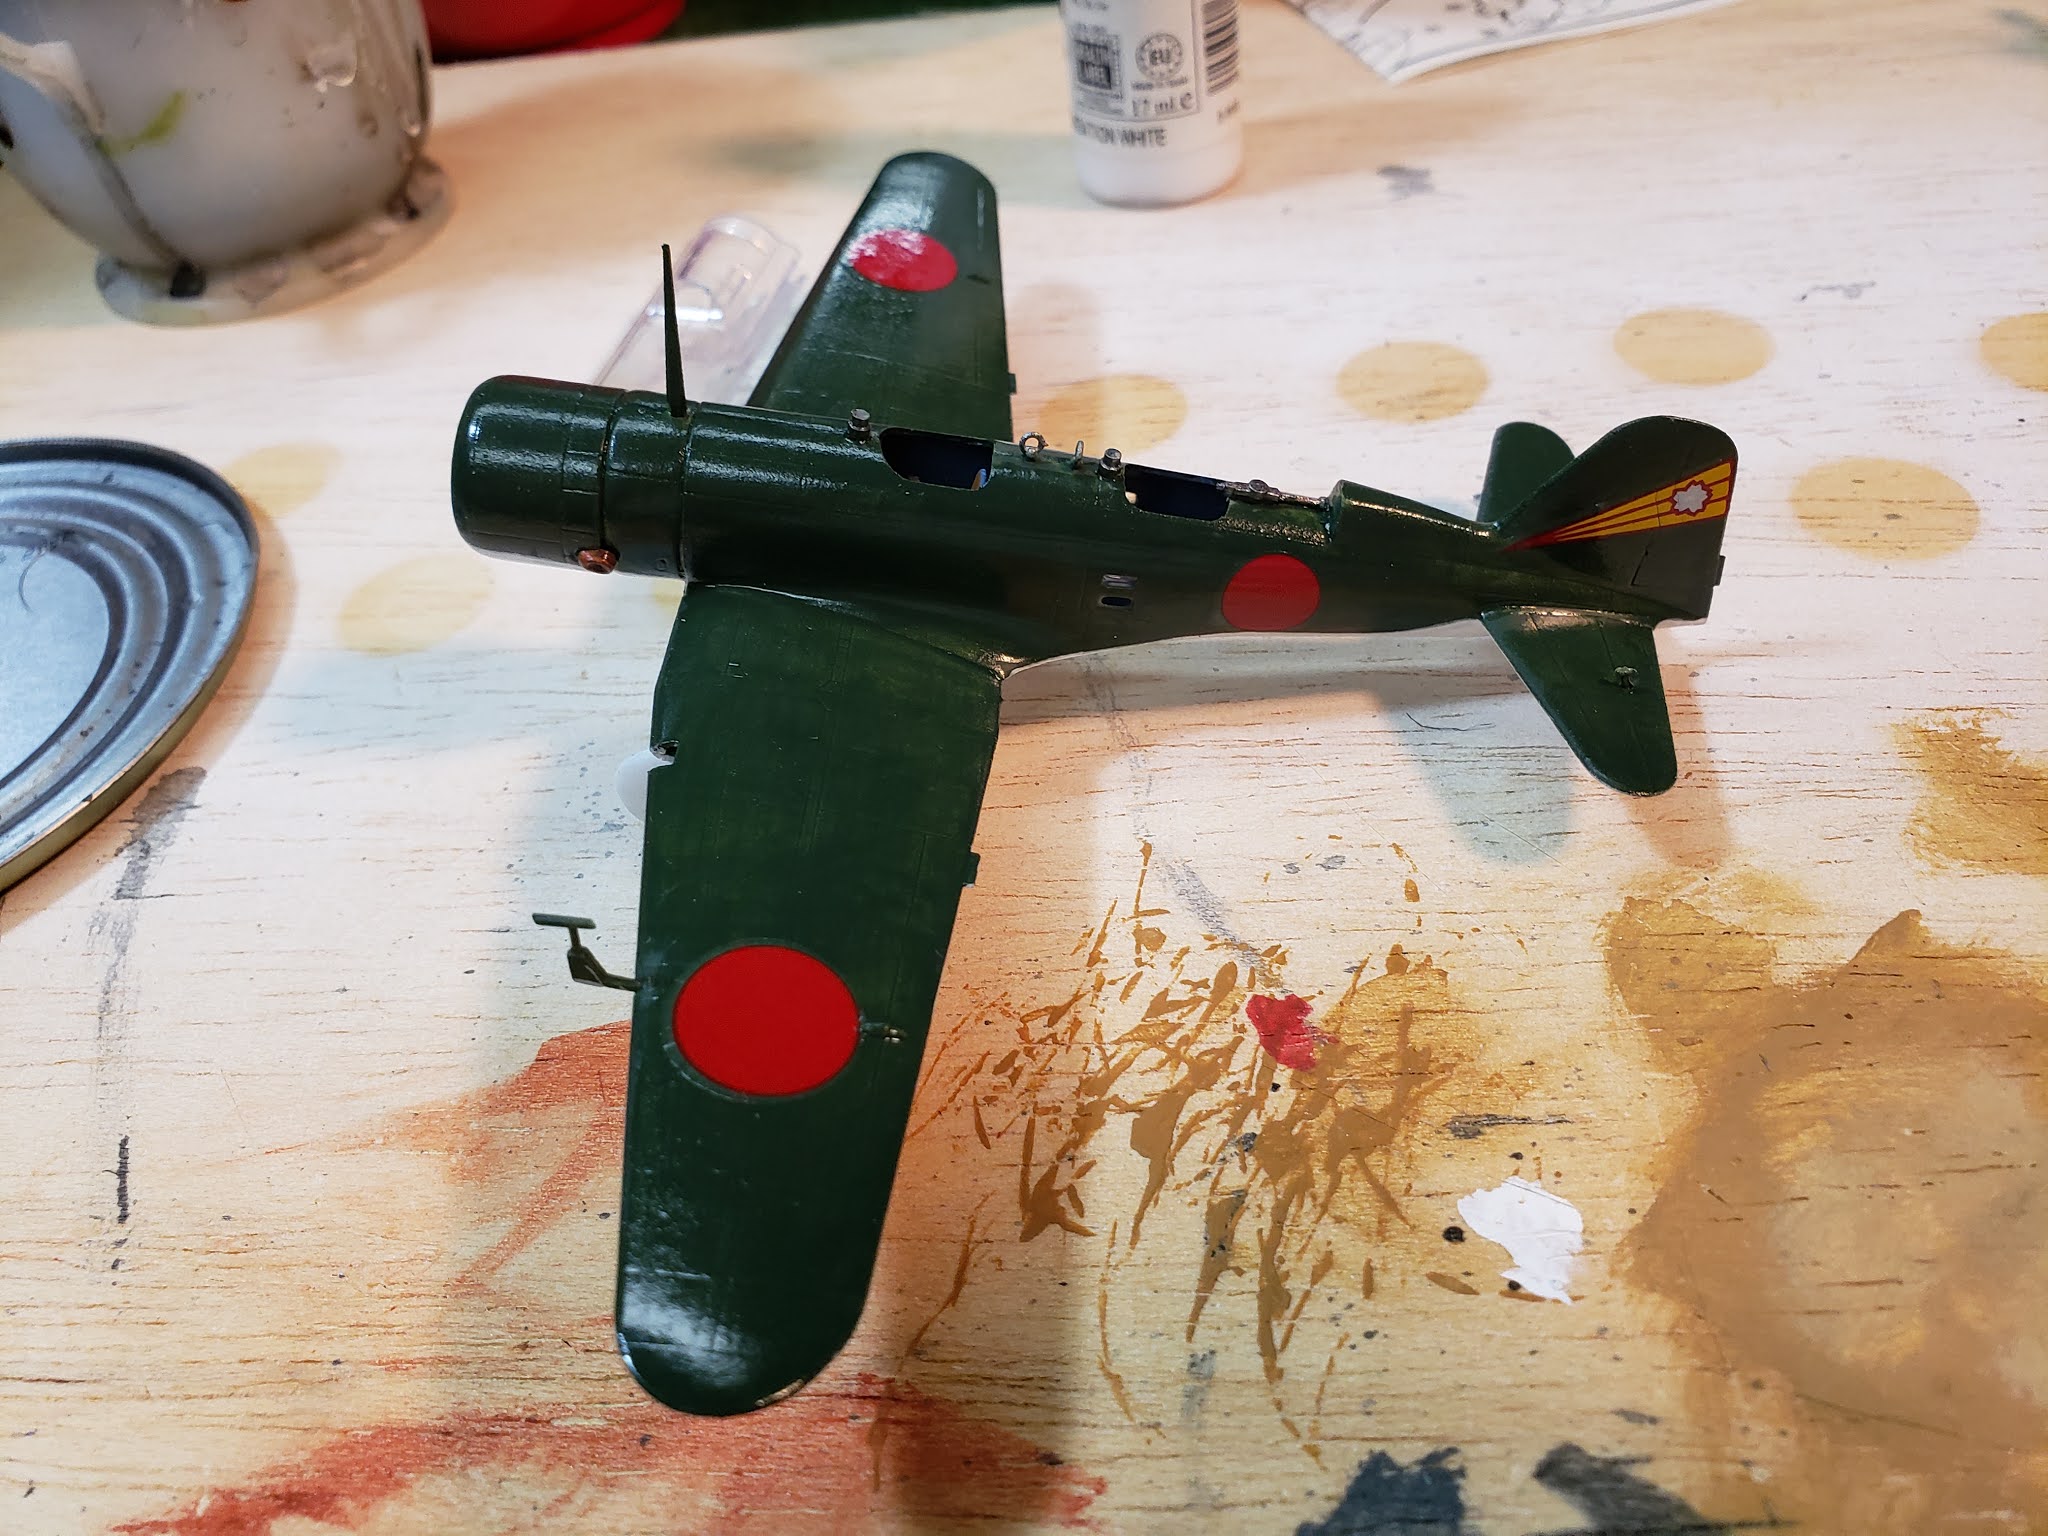
these might have to be subjected some serious solvent treatment
I tried to get this done in one night but I was defeated by the drying time of the paints. It is an excellent kit but you may want to think about alternative decals if you are planning one building one.

having given it a night I did some remedial work on the decals which took
care of the foggy surrounds and then the kit was ready for a shot of Vallejo Matte spray

a sleek and elegant looking aircraft

now it reminds me of an AT-6 Texan

and look at those spats!

I mean, they are HUGE!
It came out great!
ReplyDelete