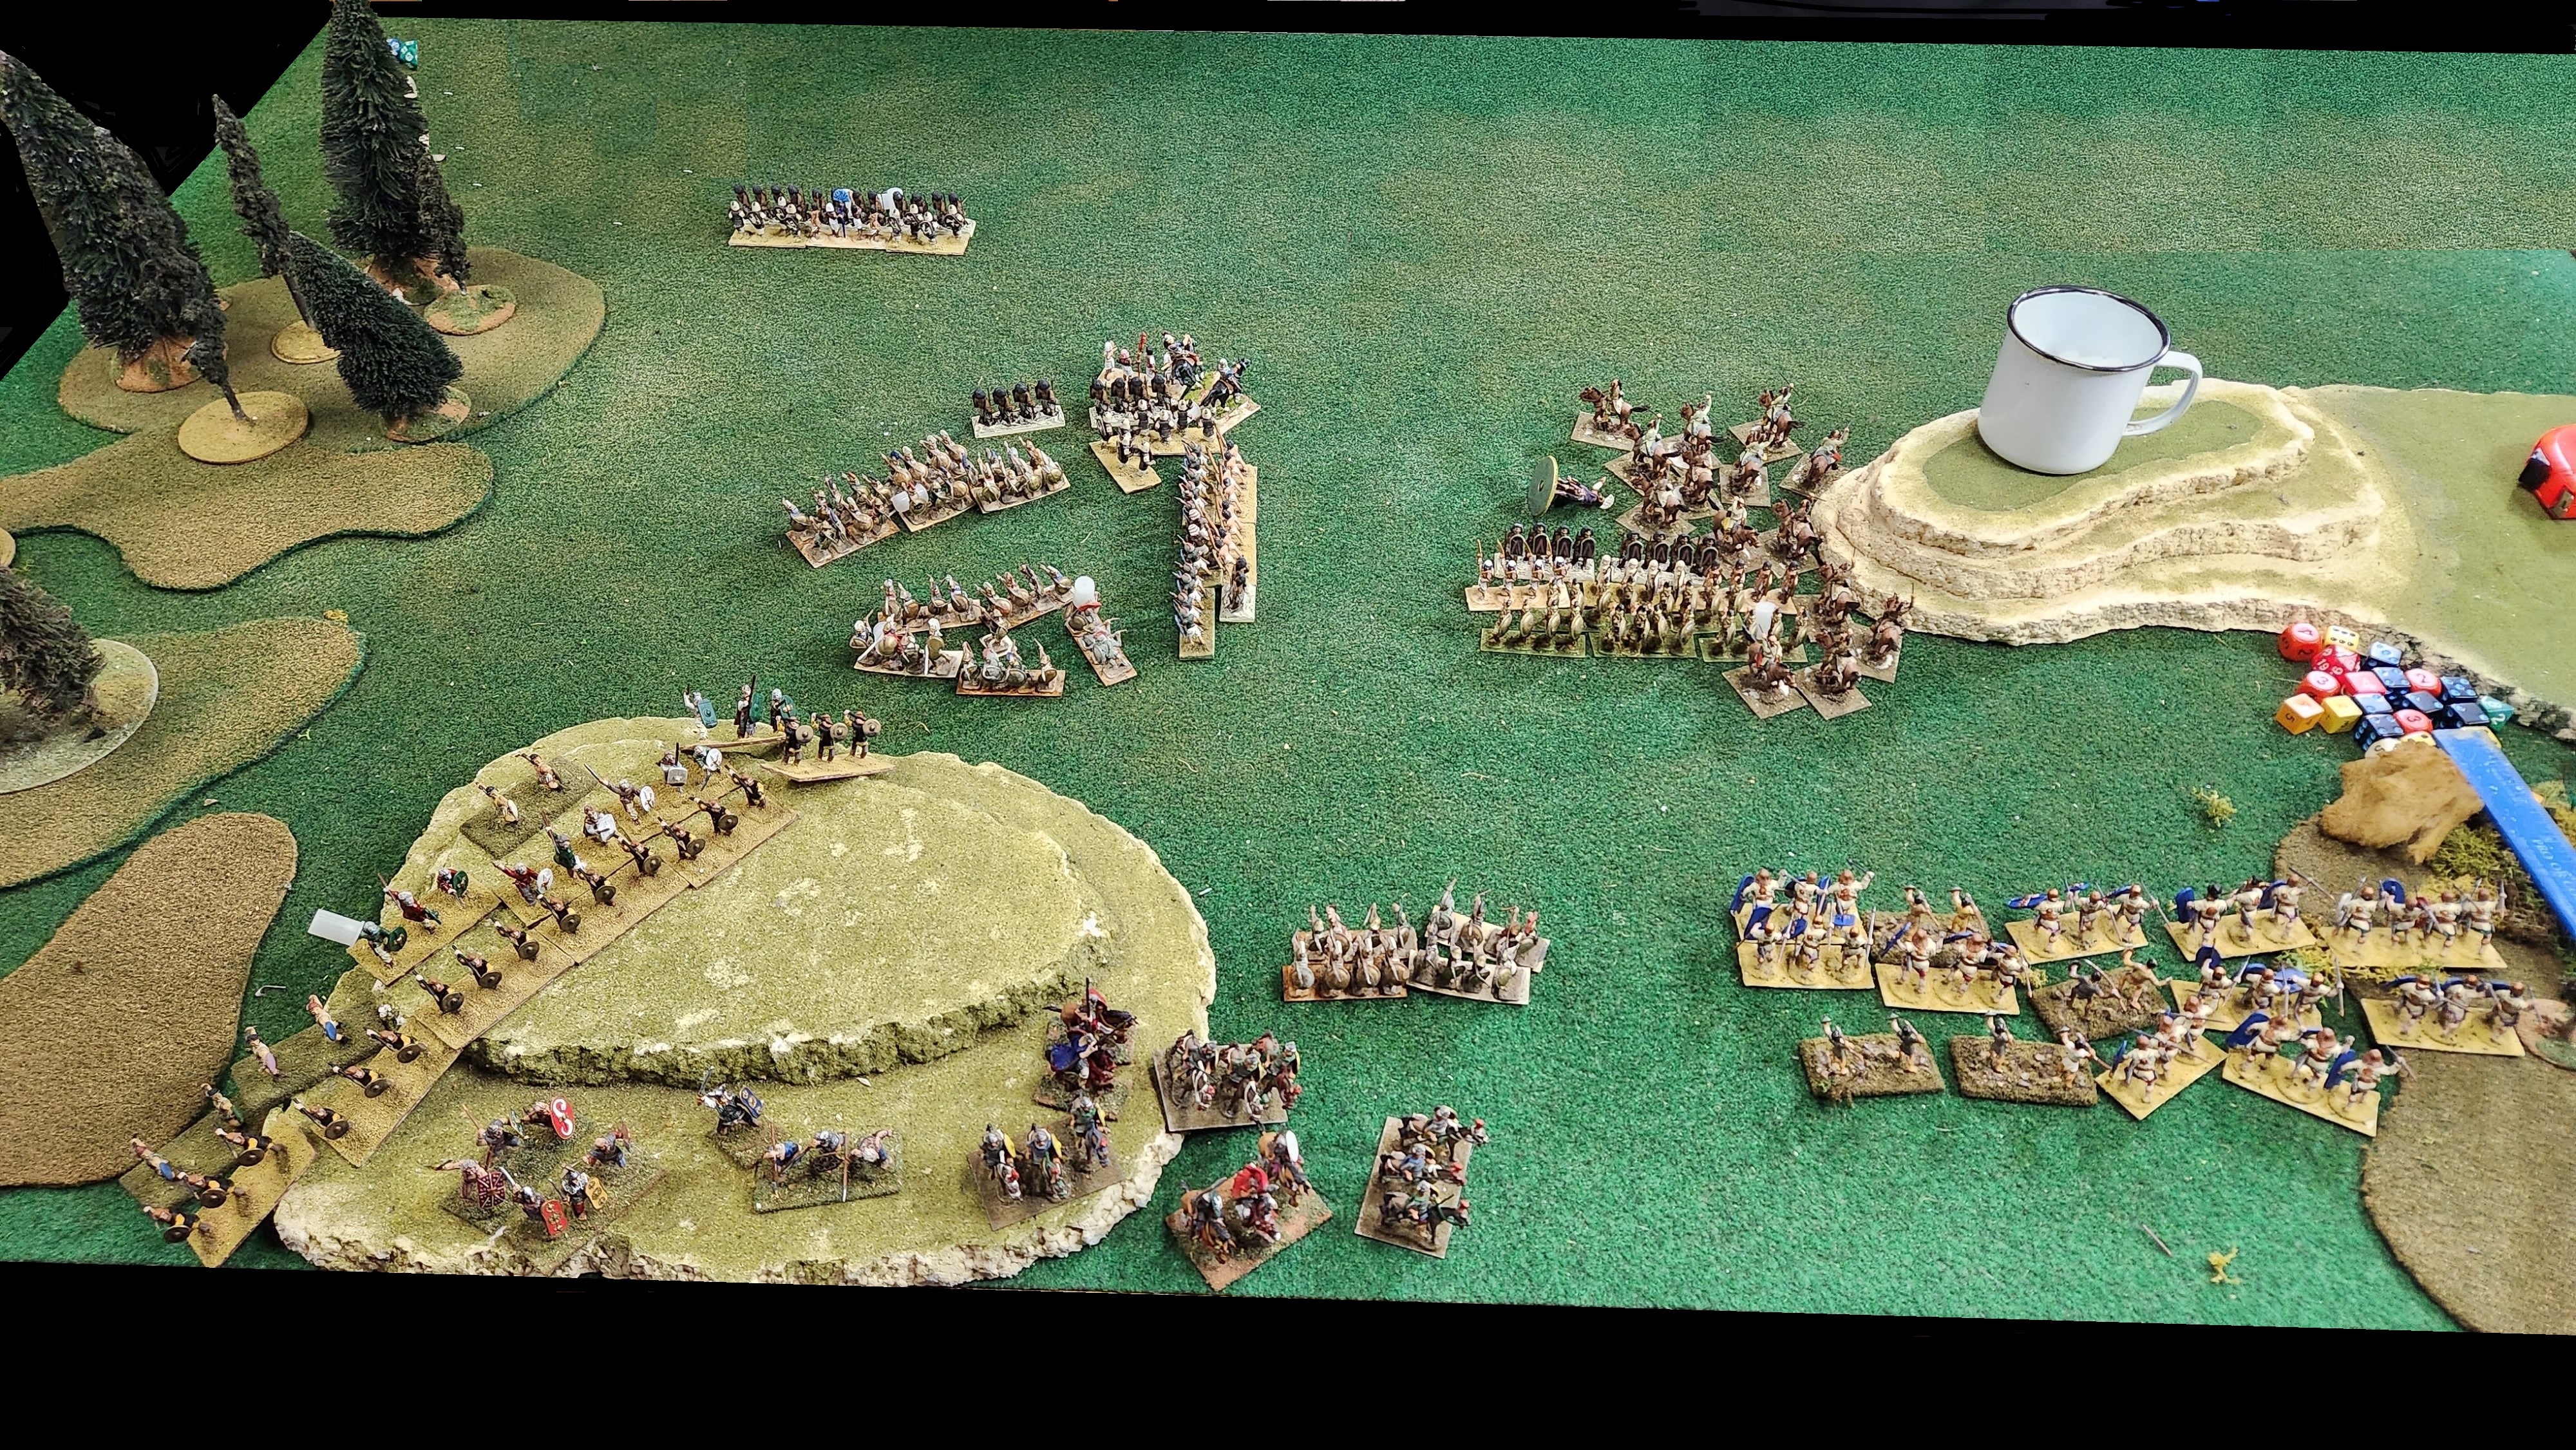
Our new scheme for our WRG games is to randomly pick a book, then each of us pick an army from the book and tell each other, that way we can tailor our field army to deal with the general opponent. This time around we used Book One (the orange, or "biblical" book). When it cam time to reveal our army selection there was some confusion as we both chose Army 59, the Marian Romans. Our confusion arose as we were both unclear if the other was asking, or telling their army. So we ended up using the army list for among the most famous civil wars in History - those of Julius and Pompey, and Mark Antony and Octavian. Here are the results. Returning to type we failed to photograph the deployments. Below is after turn 1. Anton had 43 scouting points to my 6, so my troops went on the board first.
Anton's army is the near one, mine is the further. Anton's troops were as follows from the left rear.
18 x Spanish Scutarii; IRG C, LMI, HTW & Sh
24 x Roman Legionaires; REG C, HI, HTW & Sh
24 x More Legionaires, same as above
24 x still more Legionaires, same as above
On the hill cowering between the second and third cohorts of Legionaires is the CinC, HC, JLS & Sh
24 x even more Legionaires, same as all the rest of them
Moving to Anton's front row, on the left are 14 x Gallic Cavalry; IRG B, MC, JLS & Sh
Next to them are 14 Capadocians, IRG C, LC, JLS & Sh
Hiding behind the steep hill are Anton's conniving Greeks (they are probably to blame for the Civil War) 24 figures, all are IRG C, LI, half are B, the other half are S
31 x Spanish Scutarii; IRG C, LMI, HTW & Sh round out the army and once again behind the hill.
My army consists of the following, once again from the left.
42 x Thracians and friends; all IRG C, 20 - LMI, 2HCW, JLS, & Sh, 16 - LMI, HTW & Sh and 6 - LI, JLS & Sh
24 x Legionaires; all HI, HTW & Sh, 13 REG B, 11 REG C.
24 x more Legionaires; all HI, HTW & Sh, 13 REG B, 11 REG C.
32 "Galations" 28 - IRG C, MI JLS & Sh, 4 dismounted Gallic cav IRG B, MC (MI) JLS & Sh.
24 x still more Legionaires; all HI, HTW & Sh, 13 REG B, 11 REG C.
42 x Scutarii and friends; all IRG C, 34 - LMI, HTW & Sh, 8 - LI, JLS & Sh
In the second row.
24 x Praetorians and friends; all HI, HTW & Sh, 12 REG A, 1 REG B, 11 REG C.
CinC and body guard HC, JLS & Sh (the body guard is IRG B)
On turn one both armies surged forward. Anton's Greeks were screened by the steep hill and I had no missile troops so nothing else happened.
On turn Two my Scutarii and Anton's Greeks rushed for the Hill top, but Anton's unsanitary Greeks reached the summit first. Meanwhile my Galatians went impetuous and charged the Capadocians who ran off. My second (from left) cohort charged The Medium Cavalry and they ran away as well. My right flank continued to advance while Anton's small Scutarii unit inclined to prepare for my Thracians (who were partially out of the woods making no secret of their approach) and Anton's first two cohorts contracted to give the cavalry a place to run away too. Meanwhile my Praetorian's picked up the pace to fill the gap the Galatians created by their scatter brained advance.

On turn Three we seem to have neglected to take a picture but above is the primary action. I confidently charged Anton's slingers expecting to crush them, but Anton had been reading the rules and found a wrinkle. Apparently there is a sizeable bonus for holding the high ground. Fortunately, my Scutarii rolled up two, while Anton rolled DOWN FOUR. For a brief moment it appeared that my Scutarii would be defeated, then the dice made the determination and Anton's slingers were routed.
Anton placed the offending dice in a time out.
On turn Four (which we remembered to take a picture of) saw my Galatians moved toward two Cohorts of Romans in the center and my Scutarii's follow up carried them onto Anton's larger Scutarii unit on the steep hill.
Once again Anton rolled horribly (this time only down three) in the fight on the hill and I rolled well (again up two). This time Anton was not holding the high ground (he also did not get a charge bonus as we were too close for him to claim it).
And the results were even worse resulting in Anton's larger Scutarii unit imploding. My troops continued slowly turning Anton's left flank
On turn Five, my troops finally completed their wheel onto Anton's Left, but Anton, being Anton (actually VERY Roman too), rushed his troops down off the hill on his left to force the action in the left and center. Meanwhile my Galatians finally charged into the two cohorts on the right center.
Turn Six saw my Galatians broken and my Scutarii pursuing both the unsanitary Greeks and larger of Anton's Scutarii units toward the table edge. Meanwhile Anton's fourth cohort managed to stay in contact with my Galatians slaughtering them towards my waiting battle line. On the left My Thracians and Anton's smaller Scutarii unit charged into each other. This time I rolled poorly and Anton rolled well and my much larger (42) unit of HTW armed troops were pushed back by Anton's smaller (18) unit of similarly armed troops.

Turn Seven saw the Battle lines finally close (My Galatians rolled VERY poorly on the rout movement and resulted in a negative number so they 'dissolved'). On the left, my Thracians advanced to the front for combat to replace the Scutarii. This resulted in my Thracians pushing the now smaller unit of Scutarii back. Meanwhile in the main battle line combat, the results were VERY mixed. Starting on the left; Anton's first cohort outright broke my fourth cohort. Anton's second cohort and my third Cohort exchanged pleasantries with no actual results even though my CinC was attached to my cohort. Continuing to the right my Praetorians easily pushed back Anton's third cohort, but did not break them outright. Finally, my first Cohort and Anton's fourth cohort (with Anton's general attached) simply stood each other up without any advantage appearing. The most important thing overall, my Scutarii unit, which had chased Anton's larger Scutarii and Greek units off the table and sacked Anton's camp, returned to the battle field loaded with their new booty.
On turn Eight, Anton realized that his smaller Scutarii was about the collapse so he sent his Cavalry toward the wavering flank and hoped my Praetorians would pursue into the when they broke the third of Anton's cohorts. Anton set up his light cavalry to crash into my Praetorians if they advanced. Fortunately, the Praetorians kept their heads and did not overly pursue. On the flanks, my returning Scutarii formed as a column and began marching toward the action. Meanwhile my Thracians completed breaking Anton's smaller Scutarii unit.
Anton's first cohort also managed to avoid over pursuing my broken fourth cohort. My CinC lead third cohort and Anton's Second cohort continued their inconclusive struggles. HOWEVER, matters came to resolution between my first and Anton's CinC lead fourth cohorts. My cohort managed to push Anton's back, but more importantly my Glorious First Cohort killed Anton's CinC. This necessitated an immediate morale check for Anton's Fourth Cohort. With their CinC dead, Anton's fourth realized they had just lost this Civil War and nothing good was going to happen for them here, their morale result was to run away!.

On Turn Nine My Thracians swept up onto the hill chasing the routing Scutarii. Anton's victorious first cohort turned as it rallied from its victory preparing to savage the rear of my CinC led third cohort. Meanwhile my Praetorians seeing their CinC's danger rallied planning to assist the third cohort. In the interval my third cohort and Anton's Second cohort continued their inconclusive battle and despite Anton's desperate desire to kill my CinC in response to his pretender to the throne's death, my CinC survived. However, my CinC seeing the danger of Anton's first cohort, the CinC ordered the rear rank of the third cohort to about face and prepare for that impending threat. On the right side of the field Anton's Capadocians formed cantabrian circle as my fully blinged out Scutarii Unit marched into position to charge the Capadocians. In the mean time, Anton's cavalry has been failing its morale tests to charge, but passing the tests for its routing friends. At one point Anton managed to keep the Gallic cavalry functionally on the table and in the fight despite it having seen FIVE of its fellow units rout! Amazingly hot rolls, unfortunately there was too much negativity piling up on them to allow them to do anything useful for Anton's cause.

Turn Ten proved the last turn. When charged by my Scutarii, Anton's Capadoccians broke, and their only path of escape was to rout toward my rear area, which they had been trying to move toward all game. Meanwhile, the long raging battle between my CinC lead third cohort and Anton's vengeance minded second cohort finally came to an end with both units breaking due to the impact of the fresh units on their flanks. However, Anton was incapable to accomplishing what he really wanted, the death of my rightful ruler of Rome CinC, who survived all the attacks thrown his way. My Thracians, Praetorians and First cohort all passed their required morale tests due to the CinC led third cohort's rout.
On the small hill on the left Anton's long suffering Gallic Cavalry were finally broken in spirit by the combined mental assaults of seeing their second cohort break in melee and receiving a charge on their left flank by my Thracians. The result of all this was that Anton's Cavalry and small Scutarii both routed off the field, and my Thracians pursued both off the field. And also for a quick look around Anton's camp for whatever my Scutarii missed. This left Anton's first cohort to try and face my Praetorians and First cohort, Anton conceded the game.
And so ended a very close game between to COMPLETELY even matched armies. Anton's dice performed MUCH better than usual, but in the end it all really came to do the cascade that followed the Greeks soiling themselves on the steep hill. It was a VERY interesting game to play out. Now we are on to Book Two.


No comments:
Post a Comment