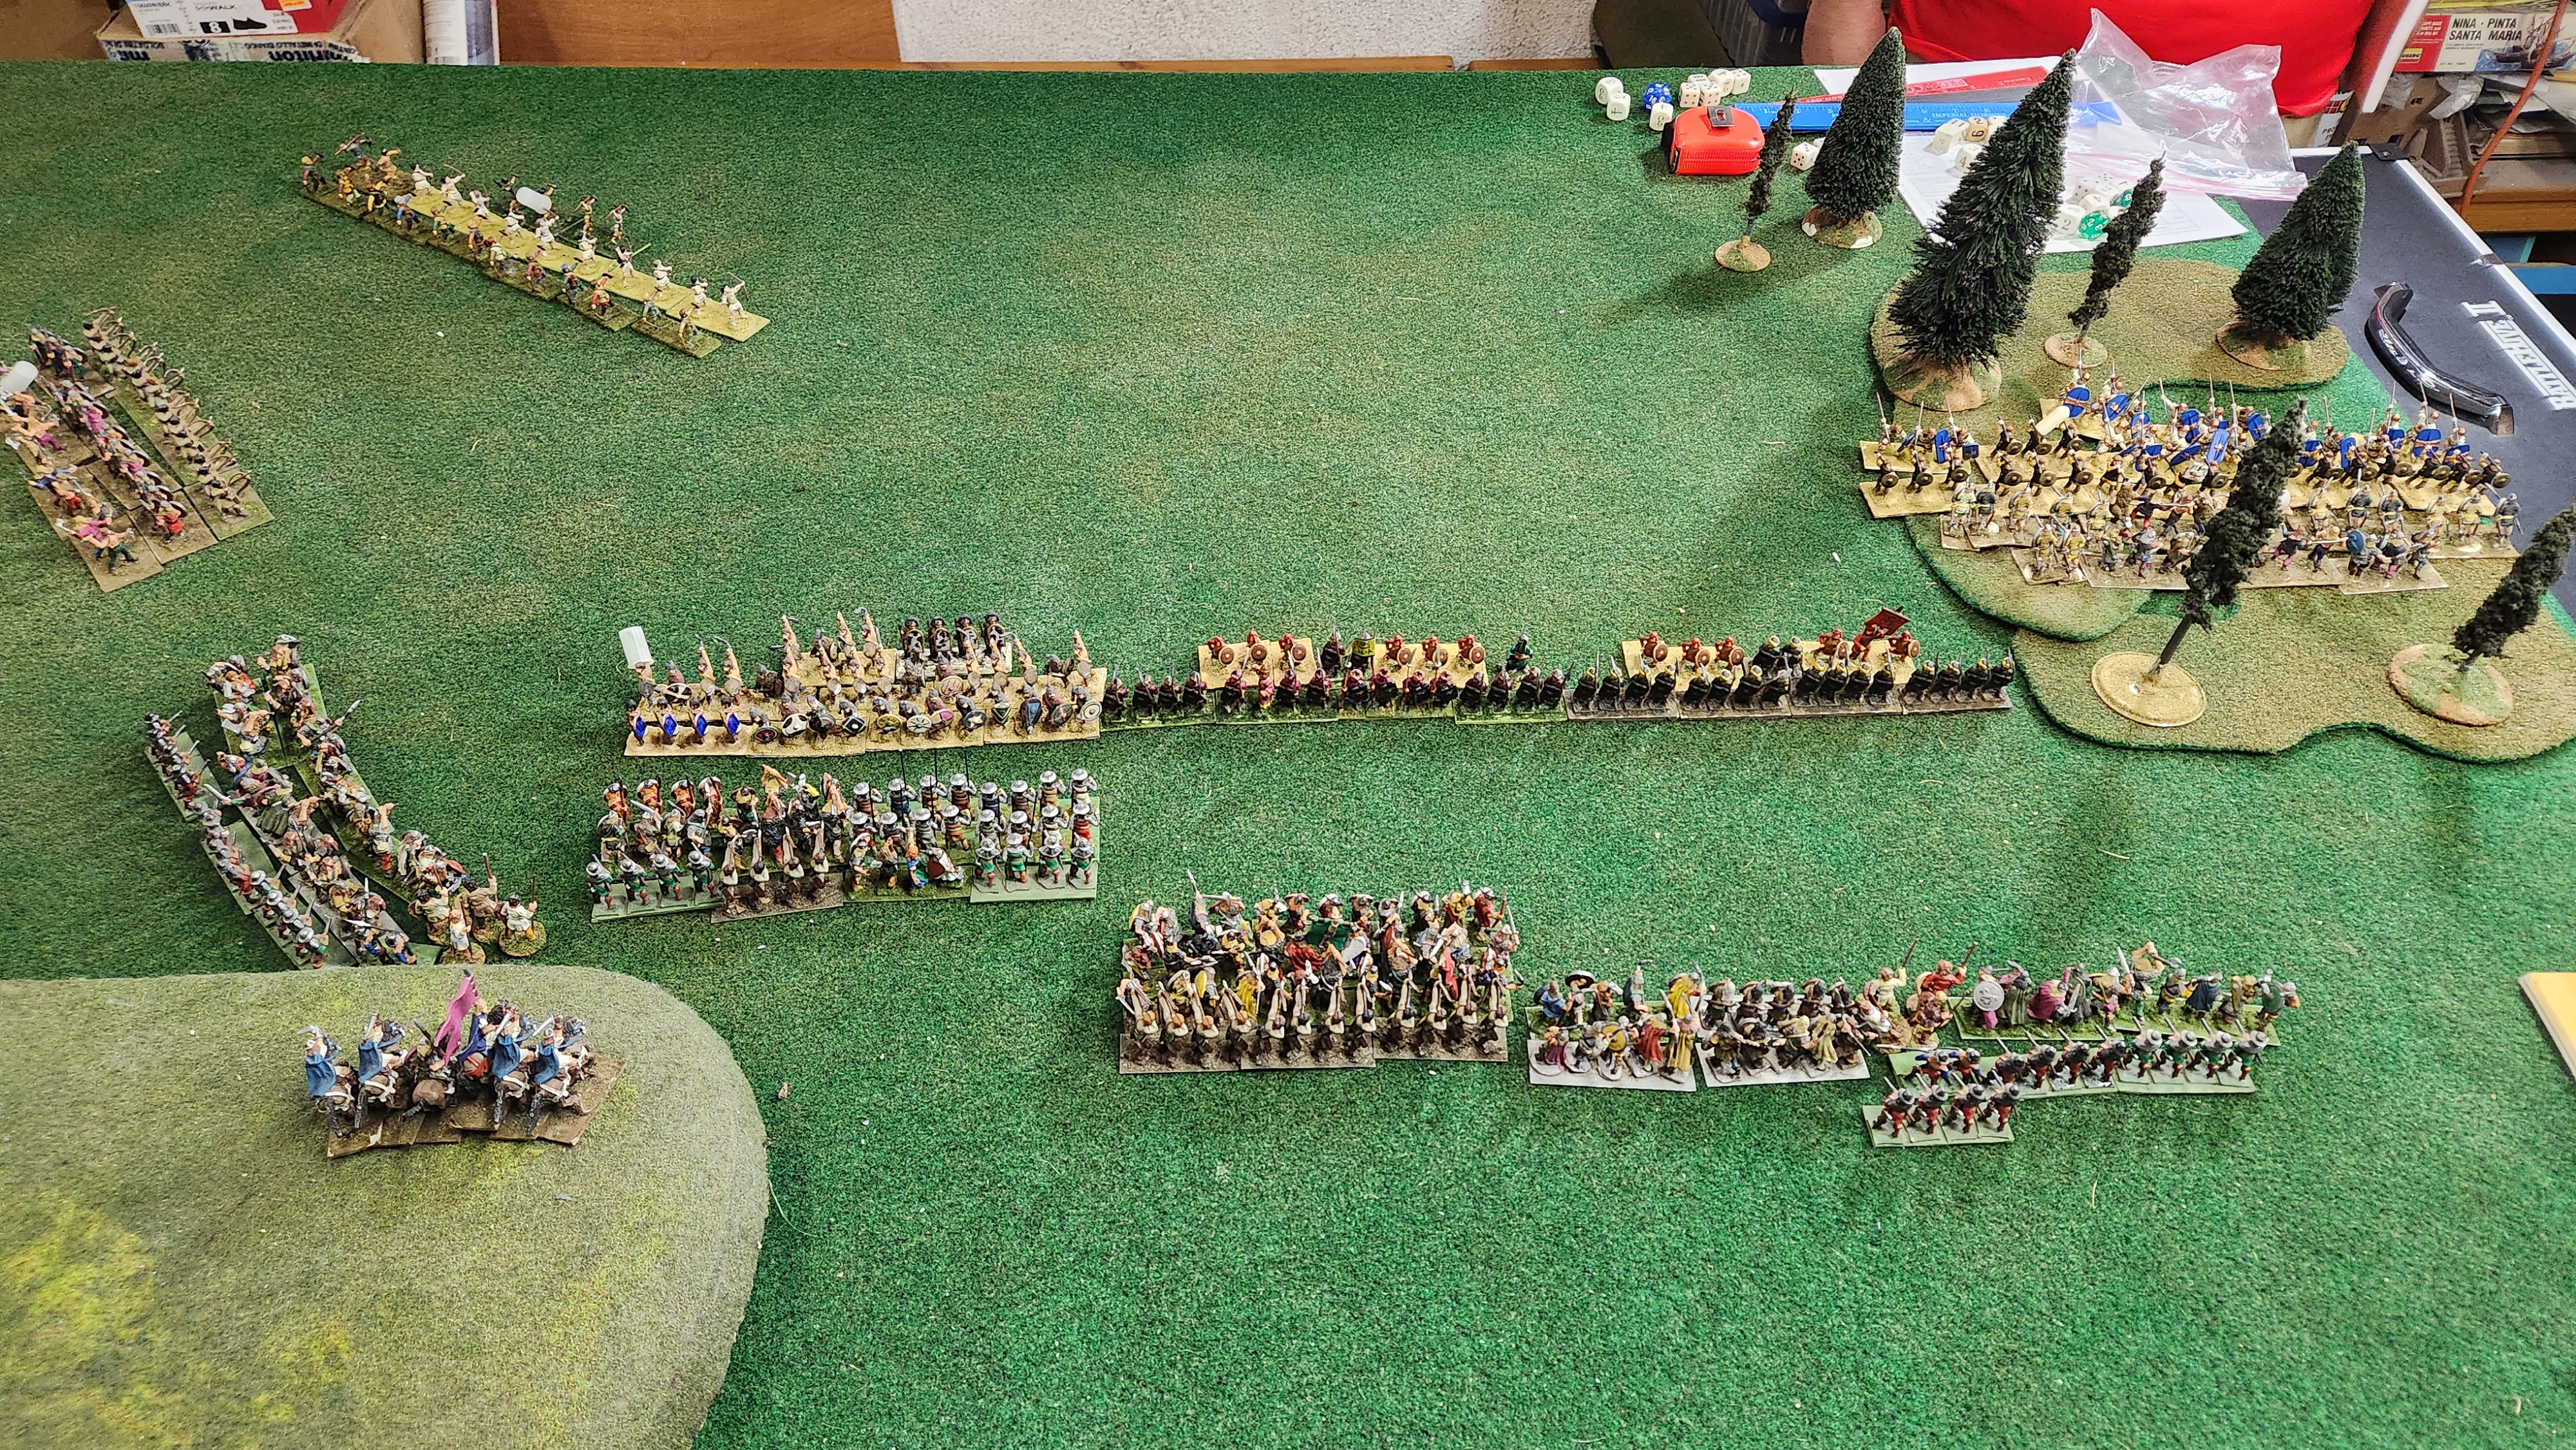
So Anton decided to change things up in our games. This time we tried randomly assigning the book, then we each chose an army from that book and told each other what our armies would be. The book rolled for was the second army book (the yellow one) Anton chose the Varangian/Russ and I chose the Feudal Spanish, let the planning and counter planning commence! Below you see the two armies on the table after the terrain was set.


Knowing what army your opponent is bringing allows you to tailor your army to their possibilities. So after I looked over my army options and Anton's I drew up the following force pictured above.
28 IRG D LI sixteen with bows and twelve with staff slings on the left.
(I had to buy them)
40 REG C 22 HI/18 MI mixed with JLS & Sh
24 IRG B, eighteen dismounted knights EHI, 2HCW & Sh and six Almughavars LMI HTW & JLS
(This unit is carrying my general's PA standard, the CinC is also standing with this unit)
24 IRG B, eighteen dismounted knights EHI, 2HCW & Sh and six Almughavars LMI HTW & JLS
42 IRG C twenty Dismounted Cavalry LHI JLS & Sh, twenty two Javelinmen LMI JLS
My thoughts were simple. Anton could take a few loose order troops plus a BUNCH more Loose order troops (Varangians plus Slavs). He could also take a few loose order troops and a bigger BUNCH of close order troops (Varangians plus Russ). His last option was to take a few loose order troops and a BUNCH of light cavalry (Varangians plus Pechnegs). Eliminating the last as unlikely, I decided that my dismounted knights could handle either of the other two options, and then it would just be a race to see if the rest of my army could keep Anton's troops busy long enough for the Knights to carry the day.

Anton surprised me and chose option II, the Varangians and Russ. His army consisted of the following:
36 Varangians IRG B, twelve LHI 2HCW & Sh, twelve LMI JLS & Sh, twelve LMI B & Sh
30 Varangians IRG B twelve LHI 2HCW & Sh, twelve LMI JLS & Sh, six IRG A LMI 2HCW & Sh
There are the four units of Russ Warriors each is as follows
48 figures all MI, all IRG C, half are LTS, JLS & Sh, a quarter are JLS & Sh, a quarter are B
In Anton's deployment the 36 figure unit of Varangians are on his left, the 30 figure unit is on his right. The four units of Russ are arrayed in between. The CinC 5 figure bodyguard HI 2HCW&Sh are behind
The picture above shows the situation after turn one. I won the scouting 20:1

Here is the situation on turn 2. I have left my scum missile troops to try and hold my right flank. I believe that Caesar would claim I tempted Anton to try and turn my shieldless flank. Meanwhile I pressed forward in the center and my left flank hoping to win their before my right flank collapsed in flames (it already being a shambles). Meanwhile in the center Anton has begun the slow and ponderous move to turn my foot sergeants flank. While it was cruel to eave my sergeants in such an exposed position, they are sergeants after all and once again their lot in life is to try and cover for their knights.
In turn 3, the battle lines closed as Anton continued his ponderous wheel. Anton chose to fire his puny bows from the Russ units at my dismounted knights. Both units of my knights immediately went Impetuous at the temerity of such a dastardly deed. On Anton's left he charged my scum missile troops who managed to retire in good order. Meanwhile our two units smashed into each other in the woods. My troops got the better of the first round and managed to push the smaller Varangian unit back.

In Turn 4, the battle for the center commenced. My sergeants bravely charged into Anton's second Russ unit, and the two units stalemated unable to push either side back. Unfortunately this stalemate doomed the sergeants as Anton's first Russ unit completed their wheel onto the Sergeants flank. All the Sergeants could do was turn to face the onslaught coming next turn (it is good to be regular!). Next, my first dismounted knight unit charged in and routed Anton's third Russ unit. My second dismounted knight unit moved into range to attack Anton's fourth and final Russ Unit. On Anton's left flank Anton decided that his Varangian unit with archers could simply "shoot down" my reforming D class skirmishers. But he quickly learned that shieldless LMI archers really take a beating from missile fire and my disordered skirmishers out shot Anton's Varangians. In the woods my dismounted cavalry once again pushed back the smaller Varangian unit. "B" class troops take a lot of pushing to break!

Turn 6 saw Anton decide on the left to advance his shielded javelinmen in front of his archers and try the alternate "firing squad" for my skirmishers. This change had the desire effect, in part. Anton out casualtied me, but my "D" class skirmishers passed their morale test and so stood to for another round of combat. Meanwhile in the center my Sergeants got pushed back instead of broken due to some VERY poor rolls by Anton, but the writing was on the walls for where this fight was going. Unfortunately, my first unit of Knights CAUGHT Anton's fleeing Russ blob #3 which allowed Anton to manuver his CinC and guard into position to take my CinC's knights in the flank. My second unit of impetuous dismounted Knights slammed into Anton's last unit of Russ and instantly shattered them once again. In the woods on the right, my dismounted cav managed to push back the smaller Varangian unit for the third time breaking them. Once again, my dismounted cav like the first dismounted knights caught the fleeing Varangians.

Turn 7 witnessed some truly staggering shifts in fortune. Anton's Varangians on the far left got impatient and charged my "D" class skirmishers. The skirmishers naturally evaded and went off the table. Carrying Anton's charge forward took Anton's larger unit of Varangians off the table too so my camp went up in flames as it was sacked by the remaining unit of Varangians.
"Sacking the camp" is something of a confusing matter in WRG. It is clearly stated as a "bad thing" for an army, but no where that we have ever been able to find is there an actual effect, There are no tests triggered on troops seeing their camp sacked. There is no negative modifier for having an army camp sacked, it is just an undefined "bad" thing. So now my troops are dealing with this "bad thing".
Meanwhile, my sergeants were pushed back again and broke under Anton's "Russ"ian offensive! Worse still for me, my first unit of dismounted knights (containing my CinC and carrying my Personal Army standard) who were taken in the flank by Anton's CinC and his bodyguard, broke and ran. They survived the first turn of the charge because they got to slaughter the fleeing Russ blob #3 so they kicked out some massive casualties, but this turn they had no victims to slaughter so they did no casualties and broke as a result of the casualties received. My second unit of dismounted knights also caught Russ blob #4 slaughtering some more "Russ"ians as a "western offensive". Anton's smaller group of Varangians managed to outrun my dismounted cavalry after another round of carnage. Thus, at the end of turn 7 I had one unit chased off my own base line and two units routed, one including my CinC and carrying his PA standard. My two good morale units took their required morale tests for seeing their CinC in flight (also known as the "French Attack" formation). The results of these tests proved quite positive for me. The impetuous knights calmed down, but passed their test. The dismounted cav simply passed their test, so I had two units in good standing. Meanwhile, when Anton rolled for his routing units continued panicked flights and all three units (Russ blob's 3 & 4 and the smaller Varangian unit) ended up with a negative movement result (they lose 2 inched off their roll for each turn already in flight). By rules, if a routed unit ends up with a net zero or lower movement, they simply disintegrate and are removed from the field. In a further break both my broken knight unit and sergeants managed to outdistance their pursuit. Anton's bodyguard and CinC decided that discretion was the wiser part of valor as they wanted no part of a forming foot knight unit heads up. I tested my first dismounted knight unit and they managed to pass their test and calmed down from routing.
At this point we called the game. We decided that it was a draw favoring Anton as we each had three units left, but Anton had sacked my camp (and it MUST count for something - right?) So, another good game with amusing moments through out. We have already determined our next game. We will be working out of the Gray book. Anton has selected the Catalan Company, and I chose the Early Crusaders. So we will see how that turns out in our next AAR.
Interesting. Never could come to grips with WRG
ReplyDeleteThe Housemartin and I have been hammering away with these rules (and versions thereof) for ages. Things go pretty smoothly, but there is a bit of chart cranking
ReplyDeleteThose charts never fail to amaze! I am still confused by the armies that could not fight their way through a Kleenex (I am talking about you Mongols).
ReplyDelete